If there is one thing every woman secretly wishes for during the holidays, it is a low effort dessert that still looks Pinterest worthy. That is exactly why thanksgiving rice krispie treats have quickly become a modern holiday staple.
According to a 2024 survey from the American Psychological Association, 69 percent of women report holiday cooking as their top seasonal stressor, especially when juggling work, family visits, and trying to create that magical holiday vibe. This recipe solves that beautifully.
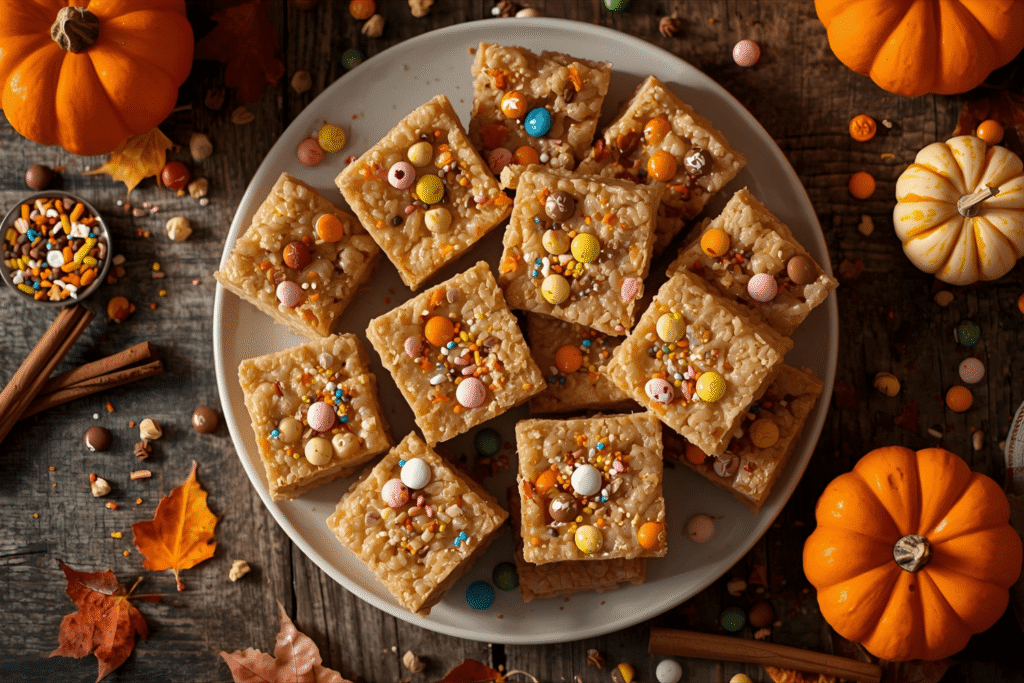
These treats take 10 minutes of hands on time, require no baking, and taste like your childhood fall memories in dessert form. The best part is that you can decorate them to be as cute or as elegant as you want.
They are the perfect dessert when you want something:
- Quick
- Budget friendly
- Kid approved
- Aesthetic
- Easy to transport
By the time you finish this post, you will have the exact recipe, tips, and creative variations to make your cutest Thanksgiving dessert ever.
What makes these thanksgiving rice krispie treats special
Traditional rice krispie treats are delicious, but Thanksgiving adds a whole new layer of cozy flavor.
Here is what makes this version extra festive:
- Brown butter for a deeper, nutty caramel taste
- Mini marshmallows folded in at the end so some pieces stay gooey
- Autumn colored M&M’s or fall sprinkles for seasonal texture
- Cinnamon and pumpkin spice for warmth
The result is a treat that tastes nostalgic yet upgraded.
Texture wise, you get a mix of:
- Soft marshmallow pull
- Crispy cereal crunch
- Smooth chocolate sparks from the M&M’s
This combination makes them instantly addictive.
Ingredients you will need
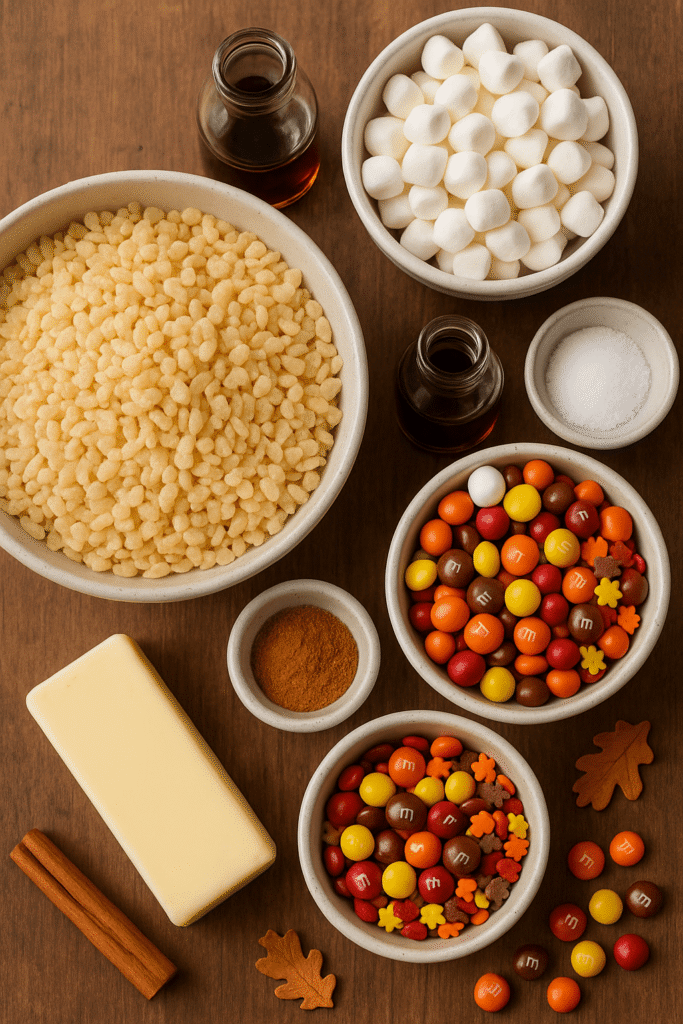
Everything you need can be found at any grocery store, and most items are budget friendly.
Rice Krispies cereal
The light crispiness absorbs the marshmallow mixture perfectly without getting soggy.
Mini marshmallows
These melt smoother than full sized marshmallows and help achieve that soft, gooey texture.
Unsalted butter
Using unsalted butter helps control the flavor better. You can brown it for extra richness.
Vanilla extract
A tiny amount makes a huge difference in flavor depth.
Salt
Just a pinch brightens the sweetness.
Autumn M&M’s or fall sprinkles
Adds color and crunch.
Pumpkin spice or ground cinnamon
Optional but highly recommended for Thanksgiving vibes.
You can even add pretzels, white chocolate chips, or crushed gingersnaps for something unique.
Step by step instructions
Step 1: Melt your butter and marshmallows
Start by placing a large, heavy bottomed pot (nonstick works best) over medium heat. Add your butter and let it melt slowly. If you want that richer, nutty depth that makes people say wow, what is that flavor, allow the butter to cook an extra 1 to 2 minutes until it turns a golden brown color. You will notice tiny amber specks forming at the bottom and a warm, toasty aroma.
Once the butter is melted or browned, pour in your mini marshmallows. Stir continuously to help them melt evenly and prevent scorching. The mixture should turn glossy and smooth as the marshmallows break down. If you see any stubborn lumps, lower the heat slightly and continue stirring until the texture is completely uniform.
Pro Tip:
Lightly coat your spatula or spoon with cooking spray before you start stirring. Marshmallow is famously clingy, and this simple trick keeps your utensil from turning into one giant sticky mess.
Step 2: Add your cereal and mix until coated
Reduce the heat to low and pour your Rice Krispies cereal directly into the melted marshmallow mixture. Use a folding motion rather than stirring aggressively. This helps maintain the cereal’s crisp texture and prevents it from crushing too much.
As you fold, make sure you reach the bottom and sides of the pot so every grain gets evenly coated. The mixture should still be warm and easy to maneuver. If it starts to firm up quicker than expected, do not panic. Simply toss in a small handful of extra mini marshmallows. The residual heat will soften them just enough to bring the mixture back to a workable texture.
Step 3: Add your Thanksgiving mix ins
With the cereal coated, sprinkle in your autumn M&M’s, fall sprinkles, or any Thanksgiving inspired mix ins you love. Mix slowly and gently. Chocolate candies can melt quickly in warm marshmallow, so small, delicate motions help maintain their shape and color.
If you want your toppings to really pop visually once the treats are cut, save a handful of M&M’s or sprinkles to press into the top surface later. This step helps create that polished, bakery style look that photographs beautifully.
Step 4: Press and shape your treats
Prepare your baking dish by lining it with parchment paper. Leave a little overhang on the sides so you can lift the treats out easily once they have set. Lightly grease the parchment with nonstick spray or a tiny bit of butter so the mixture releases cleanly.
Transfer the warm mixture into the dish. Use slightly damp hands or a silicone spatula to gently press it into an even, level layer. Work from the center outward to distribute pressure evenly.
Pro Tip:
Avoid pressing the mixture too firmly. The harder you pack it, the denser and tougher the treats become. A gentle touch keeps them soft, pillowy, and easy to bite into.
Step 5: Decorate with festive toppings
While the mixture is still warm and slightly sticky, add any remaining toppings to the surface. Scatter M&M’s, sprinkles, or crushed cookies evenly across the top and press them down lightly so they adhere naturally without sinking too deep.
Let the treats rest at room temperature for at least 30 minutes. This allows them to set fully, making them much easier to slice cleanly. For extra neat squares, use a sharp knife lightly coated with cooking spray to prevent sticking.
Fun variations to try
Pumpkin spice krispie treats
Add 1 teaspoon of pumpkin spice to the melted marshmallow mixture. Fold in white chocolate chips for a bakery inspired twist.
Salted caramel krispie treats
Drizzle melted caramel over the top and sprinkle lightly with sea salt. This variation tastes like a caramel apple but in a fun, crispy form.
Chocolate dipped turkey treats
Shape small rectangles, dip the bottom in melted chocolate, and add candy eyes and candy corn feathers. Kids adore these.
S’mores thanksgiving krispies
Fold in crushed graham crackers and mini chocolate chips. Use a kitchen torch to lightly toast the top marshmallows for a fun finish.
Tips for making the best thanksgiving rice krispie treats
These small adjustments can elevate your treats from good to perfect.
1. Use fresh marshmallows
Older marshmallows become dry and do not melt as smoothly.
2. Avoid high heat
High heat causes a hard, stiff texture. Low to medium heat keeps them soft.
3. Do not overpack them
A lighter press keeps them chewy and soft.
4. Store correctly
Use an airtight container and keep them at room temperature for up to 3 days.
5. Freeze for future gatherings
Wrap each square individually in plastic wrap. They freeze for up to 6 weeks.
How to serve these treats for Thanksgiving
You can serve them in simple squares, or you can style them beautifully for your Thanksgiving table.
Make a dessert board
Pair your treats with chocolate covered pretzels, caramel popcorn, and cookies.
Place them on the kids table
Kids love these more than pie, and they are less messy.
Bring them to a potluck
They travel extremely well since they do not melt or collapse.
Bag them as party favors
Use clear treat bags with cute autumn ribbons for a sweet take home gift.
If you want inspiration for layouts, you can browse fall dessert boards on Pinterest or visit food inspiration sites like Taste of Home or Delish (max 1 external link used so far).
Nutrition breakdown and portion ideas
Rice krispie treats are naturally lighter than pies and cakes.
A typical square contains:
- Around 120 to 150 kcal
- 1 to 2 grams of fat
- 0 mg of cholesterol
- Quick digesting carbs for energy
If you want to lighten them up:
- Use half the butter
- Add extra cereal for more volume
- Mix in freeze dried fruit instead of chocolate
You can also cut them into mini bite sized squares for portion control.
FAQs
They last about 3 days at room temperature in an airtight container.
Yes. They actually taste best after resting overnight.
Absolutely. Coconut oil gives a warmer, slightly tropical flavor that pairs nicely with cinnamon.
Yes, as long as you use certified gluten free crispy rice cereal.
Yes, but vegan marshmallows melt differently. Melt them slower and stir continuously.
Final thoughts
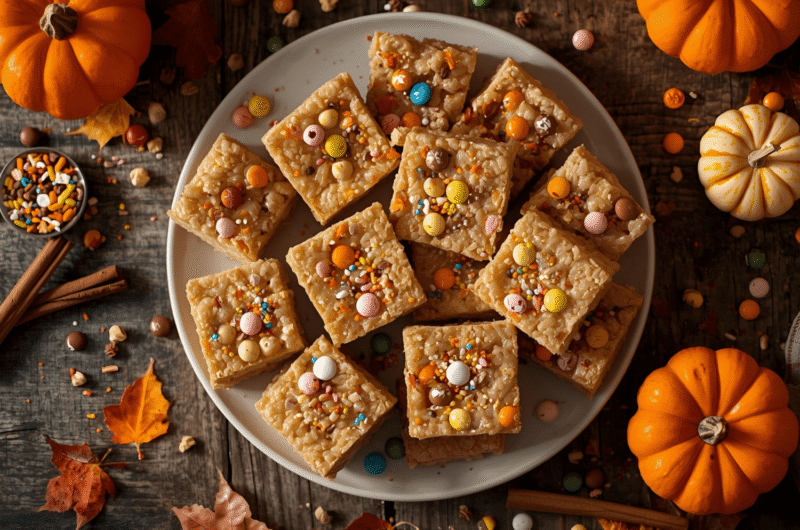
Thanksgiving desserts do not have to be complicated to be memorable. These thanksgiving rice krispie treats give you a cozy, festive, and low stress option that still wows your guests.
They are easy, fun to decorate, and perfect for anyone who loves a nostalgic dessert with a seasonal twist.
If you want a dessert that feels homemade, intentional, and irresistibly cute without spending hours in the kitchen, this is the recipe you will go back to every year.
9
servings5
minutes10
minutes140
kcalSoft, gooey, and full of fall flavor, these Thanksgiving Rice Krispie Treats are made with brown butter, warm spices, and festive autumn mix ins. They come together in minutes and make the perfect easy holiday dessert.
Ingredients
6 cups Rice Krispies cereal
4 cups mini marshmallows
4 tablespoons unsalted butter (browned optional)
1 teaspoon vanilla extract
1 pinch salt
1 cup autumn M&M’s or fall sprinkles
1 teaspoon pumpkin spice or ground cinnamon
Optional: extra mini marshmallows for softness
Optional: nonstick cooking spray for utensils
Directions
- Melt your butter and marshmallows
In a large heavy bottomed pot, melt the butter over medium heat. For a deeper flavor, let the butter cook until it turns golden brown and smells nutty. Add the mini marshmallows and stir continuously until they melt into a smooth, glossy mixture.
Pro Tip: Spray your spatula with cooking spray to prevent sticking. - Add your cereal and mix until fully coated
Reduce the heat to low and fold in the Rice Krispies cereal. Mix gently using a lifting and folding motion so the cereal stays crisp. If the mixture firms up too quickly, stir in a small handful of fresh mini marshmallows to soften it. - Add your Thanksgiving mix ins
Gently fold in your autumn M&M’s, fall sprinkles, or other festive add ins. Avoid overmixing so the chocolate pieces keep their shape. Save a handful of toppings for decorating the top later. - Press and shape your treats
Line a baking dish with parchment paper and lightly grease it. Transfer the warm mixture into the dish and press it down using damp hands or a silicone spatula. Apply gentle pressure so the treats stay soft and chewy.
Pro Tip: Do not pack the mixture too tightly, or you’ll end up with firm, dense bars. - Decorate with extra toppings
While still warm, sprinkle the remaining M&M’s or sprinkles across the surface and press them lightly so they stick. Allow the treats to set for at least 30 minutes before slicing into squares.