If you have ever wondered how to caramelize onions and ended up with either burnt bits or soggy sautéed onions, you are not alone. Caramelizing onions sounds simple, but getting that deep golden color and rich sweetness takes patience and the right technique.
When done correctly, caramelized onions transform from sharp and pungent to soft, jammy, and intensely flavorful. They elevate everything from burgers and pasta to soups and sandwiches. And once you truly master the process, it becomes one of those kitchen skills you rely on constantly.
This guide walks you through exactly how to caramelize onions, why the process works, and how to avoid the most common mistakes.
What caramelized onions actually are
Despite the name, caramelized onions do not involve added caramel or sugar. The sweetness comes from the onion itself.
Onions contain natural sugars. When cooked slowly over low heat, those sugars break down and brown through a process called Maillard reaction and caramelization. This is what creates that deep, savory sweetness.
Fun fact: raw onions are about 4–6 percent sugar, but caramelization concentrates those sugars, making them taste far sweeter than expected.
That is why rushing the process never delivers the same result.
Best onions for caramelizing
Almost any onion can be caramelized, but some work better than others.
Best options:
- Yellow onions – balanced sweetness and the most versatile
- Sweet onions – caramelize faster but can burn easily
- Red onions – slightly sharper, great for jams and toppings
Yellow onions are the gold standard because they hold their structure while developing deep flavor.
Pro Tip: Avoid white onions if possible. They caramelize unevenly and lack depth.
How to caramelize onions step by step
This is where most people go wrong. Caramelized onions are not about speed or high heat. They are about control, patience, and timing. If you rush the process, you end up with sautéed onions that taste sharp instead of deeply sweet.
Caramelization happens gradually as moisture evaporates and natural sugars break down. Every step below supports that process and helps you avoid burning or uneven browning.
Slice the onions correctly
How you slice onions affects everything from texture to cooking time. Inconsistent slices cook unevenly, which leads to some pieces burning while others stay pale.
Best method:
- Slice pole to pole, not into rings
- Aim for slices about 1/4 inch thick
- Keep slices as uniform as possible
Pole-to-pole slices hold their shape during long cooking and caramelize evenly without falling apart too early. Ring slices break down faster and are more likely to turn mushy before browning properly.
Pro Tip: If you want slightly jammy onions for spreads or sauces, slice thinner. For toppings like burgers or pizza, slightly thicker slices work better.
Choose the right pan
Your pan choice directly affects how well onions caramelize.
A wide, heavy-bottomed pan works best because it allows moisture to evaporate instead of steaming the onions.
Look for:
- Stainless steel or cast iron
- Large surface area
- Straight or gently sloped sides
Avoid nonstick pans if possible. Stainless steel encourages light sticking, which creates those browned bits on the bottom of the pan. Those bits dissolve back into the onions and build flavor over time.
Pro Tip: If your pan is too small, cook onions in batches. Overcrowding traps steam and slows browning.
Start low and slow
This step sets the tone for the entire process.
Add oil, butter, or a combination of both to the pan, then add onions before turning on the heat. This helps coat the onions evenly and prevents hot spots.
Key rules:
- Medium-low heat is ideal
- Onions should gently sizzle, not fry
- Add a pinch of salt early to draw out moisture
Salt pulls water from the onions, helping them soften without burning. This early moisture release is essential for even caramelization later.
If onions start browning aggressively within the first few minutes, the heat is too high.
When and how to stir
Stirring is a balancing act. Too much stirring releases steam and slows browning. Too little stirring leads to scorched patches.
A good rhythm:
- Stir every 5–7 minutes at the beginning
- As onions soften, stir every 2–3 minutes
- Scrape the bottom of the pan regularly
As the onions darken, sugars become more concentrated and burn more easily. This is when more frequent stirring matters.
Pro Tip: If browned bits start sticking too quickly, add a tablespoon of water and scrape gently. This deglazes the pan and prevents bitterness.
Knowing when they are done
True caramelized onions do not happen quickly, and they do not look lightly golden.
They are done when they are:
- Deep golden to rich brown
- Very soft and almost jam-like
- Dramatically reduced in volume
Onions shrink by up to 75 percent during caramelization, which surprises many cooks the first time. What starts as a full pan will finish as a small mound of intensely flavored onions.
If onions still taste sharp or slightly bitter, they need more time. Caramelized onions should taste mellow, sweet, and deeply savory.
What to expect as onions caramelize over time
One of the easiest ways to succeed with caramelized onions is knowing what they should look like at different stages. Many people stop too early simply because they think something has gone wrong.
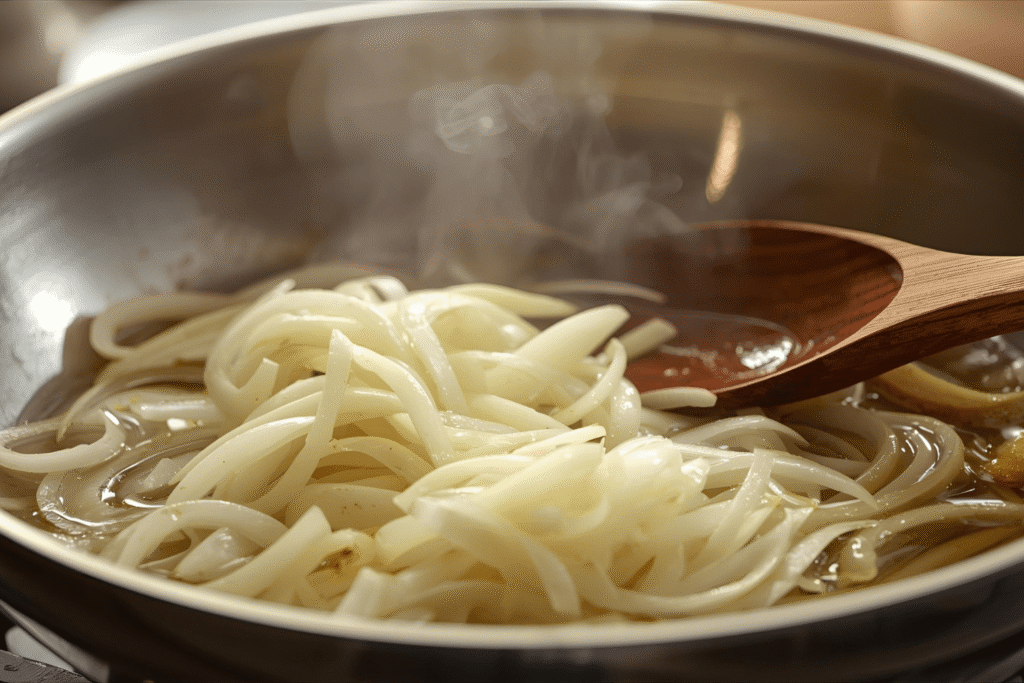
In the first 10 minutes, onions will soften and release liquid. At this stage, they often look pale and slightly translucent, which can feel underwhelming. This is normal. The moisture needs time to cook off before browning can truly begin.
Around the 20 to 30 minute mark, onions start to turn light golden in spots. The pan may look dry, and browned bits will appear on the bottom. This is where flavor begins to develop, but the onions are not done yet. They may still taste sharp or slightly bitter.
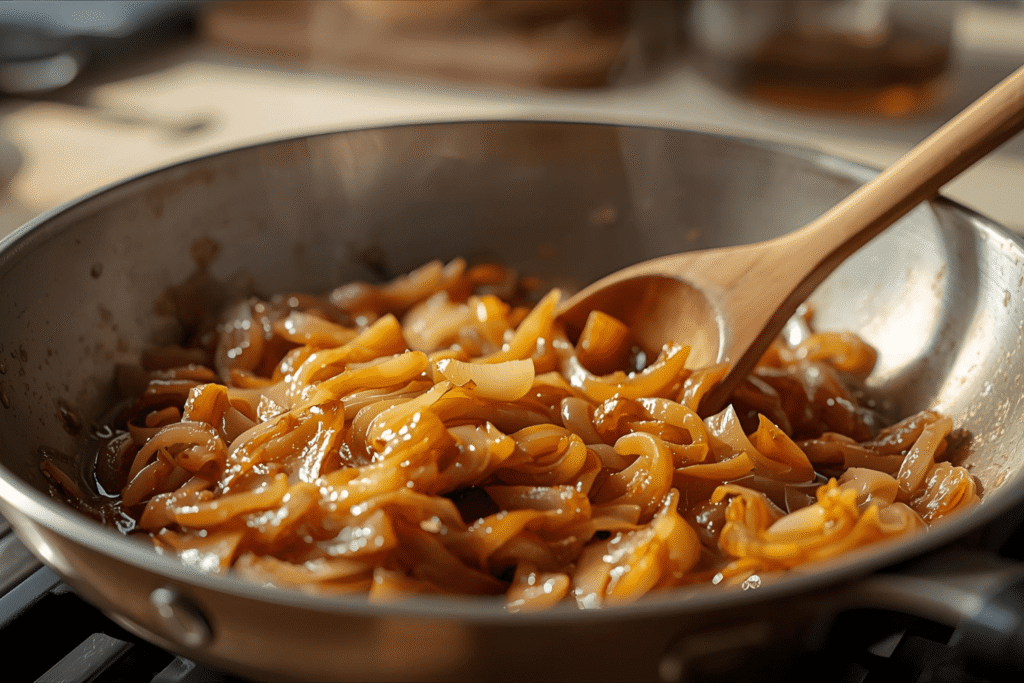
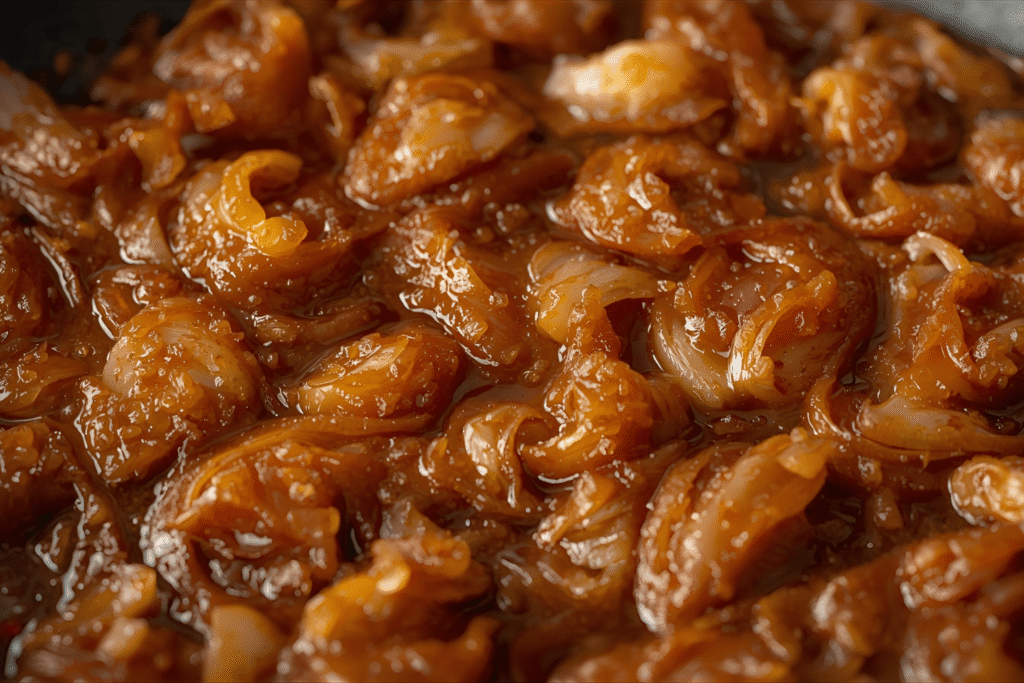
Between 40 and 60 minutes, onions deepen in color and collapse into a softer, almost jam-like texture. The aroma becomes noticeably sweet and savory. This is the stage most people are aiming for when learning how to caramelize onions properly.
Pro Tip: If onions seem stuck in one stage for a long time, resist the urge to increase heat. Time, not temperature, is what creates true caramelization.
How long it really takes to caramelize onions
This is the most misunderstood part.
Real caramelized onions take:
- 40–60 minutes on the stovetop
- Sometimes longer depending on quantity
Anything under 20 minutes is sautéed onions, not caramelized.
If a recipe promises caramelized onions in 10 minutes, it is cutting corners.
Common mistakes that ruin caramelized onions
Avoiding these mistakes makes all the difference.
Most common issues:
- Heat too high
- Stirring constantly
- Adding sugar too early
- Crowding the pan
- Walking away too long
High heat burns onions before sugars develop. Constant stirring prevents browning.
Caramelization needs patience, not force.
Faster methods and shortcuts (and when to use them)
Sometimes you want caramelized onions faster. Shortcuts exist, but they change the result slightly.
Baking soda method
Baking soda raises pH, speeding browning.
How it works:
- Add a pinch of baking soda
- Onions brown faster
- Texture becomes softer, almost jammy
Use sparingly. Too much creates a mushy texture and off flavor.
Sugar method
Adding sugar boosts browning but does not replicate true caramelization.
Best used when:
- Time is limited
- Onions are a topping, not the star
Pro Tip: If you add sugar, wait until onions are already soft and lightly golden.
How to store and reheat caramelized onions
Caramelized onions store extremely well.
Storage tips:
- Refrigerate up to 5 days
- Freeze up to 3 months
- Store in airtight containers
When reheating:
- Use low heat
- Add a splash of water or broth
- Stir gently
Freezing caramelized onions is a meal prep secret many home cooks overlook.
Best ways to use caramelized onions
Once you know how to caramelize onions, you will use them everywhere.
Popular uses:
- Burgers and sandwiches
- Pasta and risotto
- Quiches and frittatas
- Pizza and flatbreads
- Soups and gravies
According to cooking behavior surveys, onions are used in over 70 percent of savory home-cooked meals, making this one of the most practical skills to master.
For deeper science behind browning, Serious Eats explains the Maillard reaction in detail and why patience matters.
FAQs
Yes, but they are more likely to stick and burn. A small amount of fat improves flavor and control.
The heat is too high or the pan is overcrowded. Lower the heat and spread onions out.
Absolutely. They reheat well and often taste better the next day.
Yes. Onions are low calorie and contain antioxidants. Caramelizing concentrates flavor without adding much fat.
Yes, but texture is softer and less browned. The stovetop delivers the best result.
Final thoughts
Learning how to caramelize onions properly is one of those small kitchen skills that pays off constantly. It teaches patience, improves flavor awareness, and upgrades everyday meals without complicated techniques.
Once you understand the process, caramelizing onions stops feeling intimidating and starts feeling intuitive. And that is when cooking becomes both easier and far more enjoyable.