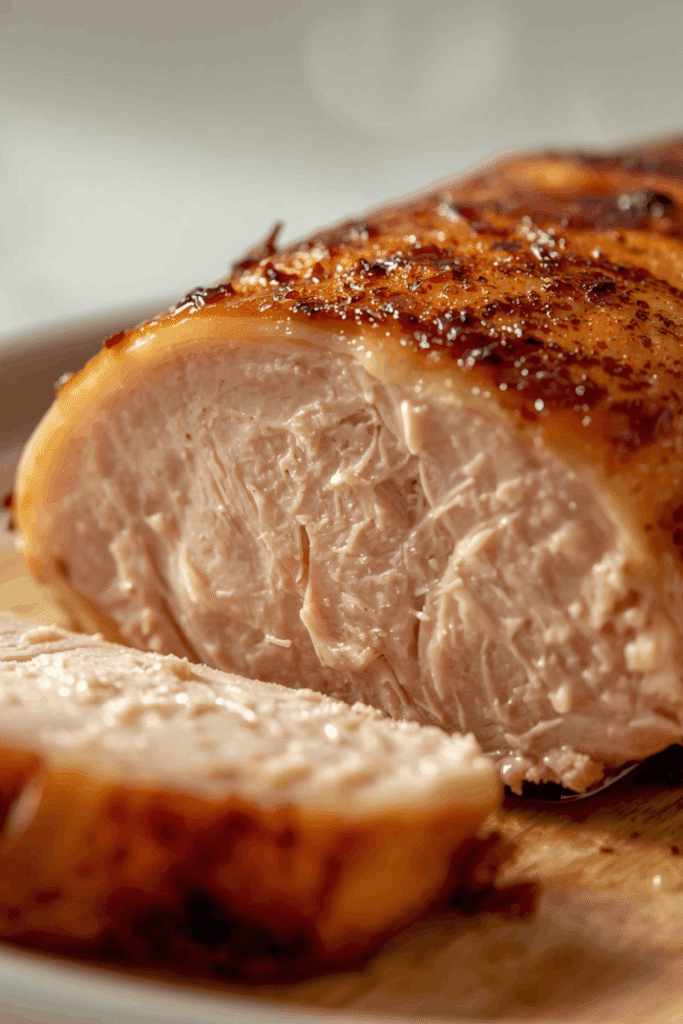
If your chicken breast keeps turning out dry, bland, or slightly sad, you are not alone. Chicken breast is one of the leanest proteins we cook, which means it has almost no margin for error.
One extra minute in the pan and suddenly you are chewing cardboard.
The secret that chefs, meal prep pros, and food bloggers swear by is simple brining.
A quick saltwater soak can increase moisture retention by up to 15 percent, according to food science testing. That translates directly into juicier meat, better seasoning, and more consistent results.
And the best part? It takes almost zero skill.
Once you learn how to brine chicken breast, you will never cook it plain again.
Let’s break it down step by step so you can start making tender, restaurant-quality chicken at home.
What brining actually does to chicken
Brining is the process of soaking meat in a saltwater solution before cooking.
It sounds basic, but the science behind it is surprisingly powerful.
Salt changes the structure of protein fibers inside the meat. As the salt dissolves into the chicken, it allows the muscle fibers to absorb and retain more water during cooking.
Instead of moisture escaping and evaporating in the pan or oven, it stays locked inside the meat.
That means:
- Juicier texture
- Better seasoning all the way through
- Less risk of overcooking
- More forgiving cooking time
According to Serious Eats’ food lab testing, properly brined chicken consistently stays noticeably moister even when cooked slightly past ideal temperature.
Brining also gives you more flavor control. You can layer in herbs, citrus, spices, or aromatics depending on the vibe you want.
Think cozy garlic-thyme chicken for winter meals or lemon-herb chicken for summer salads.
Small effort, big payoff.
Wet brine vs dry brine for chicken breast
There are two main ways to brine chicken breast.
Both work well, but each has its own sweet spot depending on your schedule and texture preference.
Wet brine
This is the classic saltwater soak.
You dissolve salt in water, submerge the chicken, and let it sit for 30 minutes to a few hours.
Best for:
- Maximum juiciness
- Beginners
- Larger batches
- Extra flavor infusion
Downside:
Requires a bowl, fridge space, and a bit of planning.
Dry brine
Dry brining means rubbing salt directly onto the chicken and letting it rest uncovered in the fridge.
The salt draws moisture out, then reabsorbs it along with seasoning.
Best for:
- Crispier exterior when roasting or air frying
- Faster prep
- Minimal cleanup
Downside:
Slightly less moisture boost than wet brine.
If your goal is ultra-juicy meal prep chicken or grilled chicken breasts, wet brine wins.
That is what we will focus on in this guide.
How to brine chicken breast step by step

This method works for boneless, skinless chicken breasts and scales easily for meal prep.
Ingredients
- 4 cups cold water
- 2 tablespoons kosher salt
- 1 pound chicken breast
Optional flavor boosters:
- 1 tablespoon sugar or honey
- Garlic cloves
- Fresh herbs like rosemary or thyme
- Lemon peel or peppercorns
Instructions
- Dissolve the salt.
Stir salt into cold water until fully dissolved. - Add flavor boosters if using.
This is optional but highly recommended for depth. - Submerge the chicken.
Make sure the chicken is fully covered. - Cover and refrigerate.
Brine for 30 minutes to 2 hours. - Remove and rinse lightly.
Pat completely dry before cooking.
That’s it.
No fancy equipment. No complicated timing.
How long should you brine chicken breast?
Timing matters more than most people realize.
- 30 minutes: Light moisture boost and seasoning
- 1 hour: Sweet spot for most home cooking
- 2 hours: Maximum juiciness
- Over 2 hours: Can start tasting too salty or mushy
Chicken breast is delicate. Longer is not always better.
If you are cooking especially thick chicken breasts or bone-in pieces, you may want to stay closer to the 60–90 minute range to ensure the salt penetrates evenly. Thinner cutlets, sliced chicken, or tenderloins absorb salt much faster and should stay closer to the 30-minute mark to avoid over-seasoning. Adjusting time based on thickness helps you get consistent results every time.
Pro Tip: Set a phone timer so you do not accidentally over-brine while scrolling Pinterest.
Salt ratios that actually work
Getting the salt ratio right prevents over-salting and keeps texture perfect.
For wet brine:
- 1 tablespoon kosher salt per 2 cups water
That creates a roughly 3–4% salt solution, which is ideal for poultry.
If using table salt instead of kosher salt, reduce by about 25% because table salt is denser.
Example conversion:
- Kosher salt: 2 tablespoons
- Table salt: 1.5 tablespoons
If you are scaling up:
- 8 cups water = 4 tablespoons kosher salt
Simple math. Easy consistency.
Flavor ideas to level up your brine
Plain saltwater works beautifully, but adding flavor turns your chicken into something special.
Here are some easy combos that pair well with most meals:
Lemon herb brine
- Lemon peel
- Thyme
- Garlic
- Black pepper
Perfect for salads, grain bowls, and Mediterranean dishes.
Honey garlic brine
- 1 tablespoon honey
- Crushed garlic
- Black pepper
Great for roasting and air frying.
Spicy southwest brine
- Chili flakes
- Cumin
- Smoked paprika
Amazing for tacos and wraps.
Flavor compounds penetrate lightly during brining, so keep aromatics subtle rather than overpowering.
Best ways to cook brined chicken breast
Once your chicken is brined and dried, you can cook it using almost any method.
The moisture retention makes all of these easier and more forgiving.
Pan searing
- Medium-high heat
- Light oil coating
- 5–7 minutes per side depending on thickness
You get golden crust and juicy center.
Oven baking
- 400°F (205°C)
- 18–22 minutes
Perfect for batch cooking.
Air frying
- 375°F (190°C)
- 12–15 minutes
Fast, crispy edges, minimal cleanup.
Grilling
- Medium heat
- Oil grates lightly
- Flip once
Smoky and charred without drying out.
Chicken should reach 165°F internal temperature for safe consumption.
A simple meat thermometer removes all guesswork.
Common brining mistakes to avoid
Even simple techniques have a few pitfalls.
Avoid these to keep results consistent:
- Over-brining.
Leads to rubbery texture and excess salt. - Skipping the rinse and dry.
Surface salt prevents browning. - Using warm water.
Always brine cold to stay food-safe. - Overloading flavors.
Strong spices can overpower delicate chicken. - Forgetting fridge space.
Plan ahead so your container fits easily.
Food safety matters too. Keep raw chicken refrigerated during brining and never reuse brine.
Meal prep and storage tips
Brined chicken is a meal prep dream.
It stays moist even after reheating, which solves one of the biggest healthy eating frustrations.
Storage
- Fridge: Up to 4 days cooked
- Freezer: Up to 3 months
Store in airtight containers with a splash of cooking juices to preserve moisture.
Reheating
- Microwave with damp paper towel
- Skillet with a tiny splash of water
- Air fryer at low temp for short bursts
Avoid overheating, which dries protein fast.
Pro Tip: Slice chicken after cooling. This keeps juices inside instead of leaking out on your cutting board.
Is brining worth it for everyday cooking?
Absolutely.
Brining takes about 5 minutes of active work and delivers consistent results every time.
If you cook chicken even twice per week, that adds up to dozens of better meals each month.
Small habits compound fast.
Better texture means:
- Less sauce dependency
- Fewer food disappointments
- Easier calorie control
- More confidence in the kitchen
For busy women balancing work, fitness, and life logistics, reliable cooking shortcuts matter.
FAQs
You should fully thaw chicken before brining. Frozen meat does not absorb salt evenly and creates food safety risks during uneven thawing.
No. Sugar is optional. It adds slight sweetness and helps browning but does not impact moisture retention.
It is not recommended. Chicken breast is lean and will become overly salty or spongy if left too long.
Stick to 30 minutes to 2 hours.
Yes, but lightly. The meat is already seasoned internally. Focus on surface spices rather than additional salt.
No. Brine touches raw poultry and must be discarded immediately after use.
When done correctly, it enhances natural flavor rather than making it salty. Over-brining causes saltiness, not the method itself.
Final thoughts
Learning how to brine chicken breast is one of those small kitchen habits that quietly upgrades your everyday meals without adding extra effort or complexity. It takes just a few minutes of prep, uses ingredients you already have at home, and delivers noticeably juicier, more flavorful chicken every single time.
Once you build it into your routine, you stop worrying about dry, disappointing results and start cooking with a lot more confidence. Brining helps your chicken stay tender, reheat better for leftovers, and hold seasoning more evenly, which makes healthy meals far more enjoyable and sustainable long-term.
Over time, these small improvements really add up. When your food tastes better and feels easier to prepare, sticking to home cooking becomes less of a chore and more of a habit you actually enjoy.