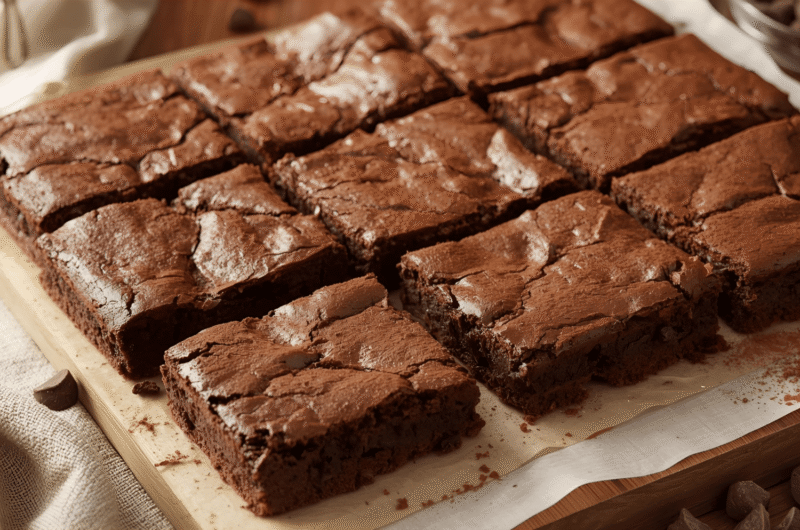
If you’ve ever craved rich, gooey, melt-in-your-mouth brownies but thought, “That looks complicated,” this post is for you. Today, you’ll learn how to make the easiest chocolate brownies recipe ever, fudgy in the center, with a slightly crisp top and deep chocolate flavor that tastes like it came from a fancy bakery.
The best part? No mixer. No weird ingredients. Just one bowl and about 40 minutes total.
So grab your whisk, preheat your oven, and let’s make brownies that could easily become your new weekend ritual.
Why you’ll love this chocolate brownies recipe
There are thousands of brownie recipes out there, but this one’s special. Here’s why:
- One bowl, zero fuss: Less cleanup, less mess, more chocolate.
- Fudgy perfection: The right mix of butter, sugar, and eggs gives that shiny top and gooey middle.
- Customizable: You can add nuts, swirl in peanut butter, or top with sea salt.
- Beginner friendly: No complicated steps, ideal even if this is your first baking attempt.
Fun fact: According to Statista, over 230 million Americans consumed brownies in 2023, proof that this classic dessert never goes out of style.
Ingredients you’ll need
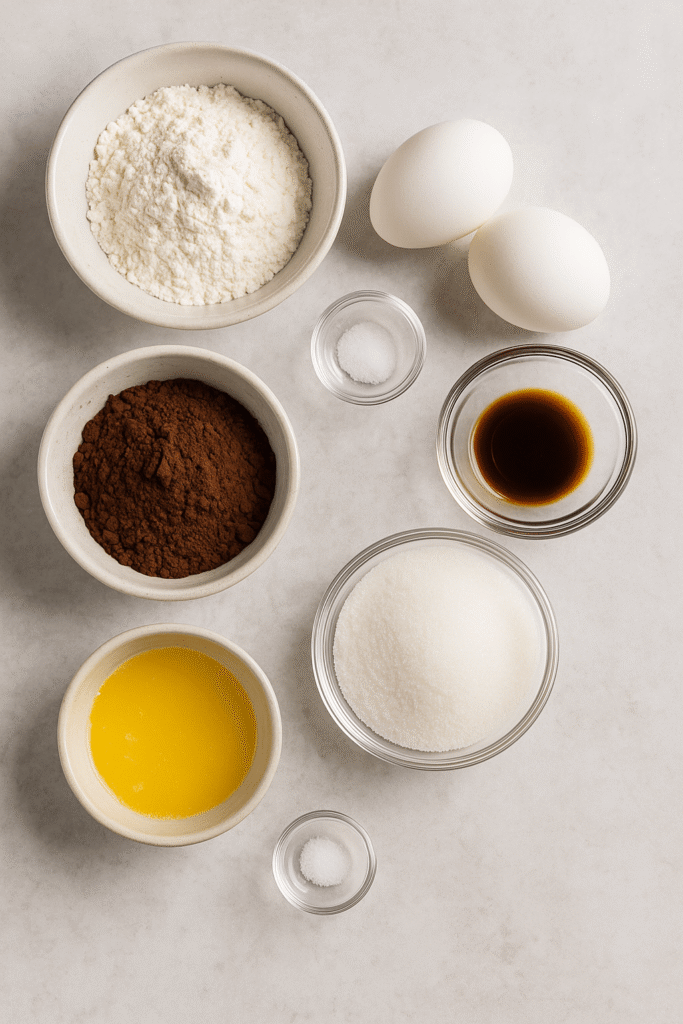
You don’t need fancy chocolate or pastry-chef skills to make brownies taste incredible. The magic comes from the right ratios.
Dry ingredients
- ½ cup (65g) all-purpose flour
- ½ cup (50g) unsweetened cocoa powder (use a high-quality one for deep flavor)
- ¼ teaspoon salt
Wet ingredients
- ½ cup (115g) unsalted butter (melted)
- 1 cup (200g) granulated sugar
- 2 large eggs
- 1 teaspoon vanilla extract
Extras (optional but amazing)
- ½ cup (90g) chocolate chips or chunks
- A handful of chopped walnuts or pecans
- A sprinkle of flaky sea salt on top
Pro Tip: Always measure flour correctly. Spoon it into your measuring cup and level it off with a knife. Packing it in can make brownies cakey instead of fudgy.
Step-by-step instructions
This chocolate brownies recipe is easy enough that you’ll memorize it after just one try. Even if you’re new to baking, these steps will guide you to brownie perfection, soft, gooey centers with that irresistible crackly top.
Step 1: Preheat and prep
Start by preheating your oven to 350°F (175°C). This gives your oven enough time to reach the ideal baking temperature before you place the brownies inside.
Next, line an 8×8-inch (20x20cm) baking pan with parchment paper. Leave a little extra hanging over the edges, this creates “handles” that make it easy to lift the brownies out later without breaking them.
If you don’t have parchment paper, you can lightly butter the pan or use non-stick spray, but parchment gives the best results and keeps the edges from sticking.
Pro Tip: Lightly grease the pan before placing the parchment, it helps the paper stick and stay flat.
Step 2: Melt the butter
In a microwave-safe bowl, melt your butter in 20-second bursts, stirring in between, until it’s completely liquid. This prevents overheating and keeps it from splattering. You can also melt it gently over the stove if you prefer.
Once melted, let it cool for a couple of minutes. The butter should be warm to the touch but not hot, if it’s too hot, it can partially cook the eggs in the next step, ruining the texture.
Pro Tip: Using real butter (not margarine) makes a big difference in flavor. Butter gives the brownies richness and depth that oil alone can’t match.
Step 3: Mix in sugar, eggs, and vanilla
Add your sugar to the melted butter and whisk until fully combined. You’ll notice the mixture becoming grainy at first, that’s normal. Keep whisking until it turns smooth and glossy.
Next, add the eggs one at a time, whisking after each addition. This ensures they’re fully incorporated and helps emulsify the mixture. Finally, pour in your vanilla extract and whisk until everything is silky and slightly thick.
This step is crucial, the air you introduce while whisking helps create the shiny, crackly top that’s the hallmark of a perfect brownie.
Pro Tip: Whisk for at least 1–2 minutes after adding the eggs. The batter should look lighter in color and slightly frothy before moving on.
Step 4: Add dry ingredients
Place a fine mesh sieve or sifter over the bowl and sift in your cocoa powder, flour, and salt. Sifting prevents lumps and ensures an even distribution of ingredients, no dry pockets of cocoa in your brownies!
Using a rubber spatula or wooden spoon, gently fold the dry ingredients into the wet mixture. Work slowly and stop as soon as you no longer see streaks of flour. Overmixing can make the brownies dense or cakey, so less is more here.
You’re aiming for a thick, shiny batter that feels a bit heavier than cake batter but still easy to spread.
Pro Tip: For extra flavor, you can add a teaspoon of espresso powder or instant coffee granules at this stage, it enhances the chocolate taste without adding any coffee flavor.
Step 5: Add your extras
Now it’s time to make the brownies your own. Fold in any extras like chocolate chips, chunks, or chopped nuts. Chocolate chips melt into little pockets of gooeyness, while nuts add crunch and a toasty flavor that balances the sweetness.
You can also swirl in a few spoonfuls of peanut butter or Nutella for a marbled effect. Just drag a knife gently through the top before baking.
Pro Tip: Toss chocolate chips or nuts in a tiny bit of flour before adding them to the batter. This helps keep them from sinking to the bottom.
Step 6: Bake
Pour the batter into your prepared pan and use your spatula to spread it evenly into the corners. The batter will be thick, so take your time to smooth it out for an even bake.
Place the pan on the middle rack of your preheated oven and bake for 20–25 minutes if you love fudgy brownies, or 30 minutes for a slightly more set texture.
The baking time can vary slightly depending on your oven, so start checking at the 20-minute mark. Insert a toothpick or skewer into the center, if it comes out with a few moist crumbs but no wet batter, your brownies are done.
Pro Tip: Don’t rely solely on the edges. Even if the sides look firm, the center might still need a few more minutes. Slight underbaking gives you that soft, melt-in-your-mouth texture everyone loves.
Step 7: Cool and slice
Once baked, remove the pan from the oven and place it on a wire rack to cool. Resist the urge to cut into them right away, as tempting as that fudgy smell is, the brownies need to set.
Let them cool in the pan for at least 30–45 minutes before lifting them out using the parchment paper overhang. For perfectly clean edges, chill them in the fridge for 20 minutes before slicing.
Use a sharp knife and wipe it clean between cuts to keep the squares neat. You can cut them into 9 large brownies or 12 smaller ones, depending on your preference.
Pro Tip: If you’re serving them warm with ice cream, go ahead and cut while slightly warm, the melting ice cream over gooey brownies is absolutely irresistible.
Texture guide: fudgy vs. cakey brownies
Everyone has a brownie personality. Are you team fudgy or team cakey?
Here’s how to control the texture:
| Type | How to get it | Baking time | Result |
| Fudgy | Less flour, more butter, shorter bake | 20–25 mins | Gooey and dense |
| Cakey | More flour, slightly longer bake | 28–32 mins | Light and airy |
| Chewy | Use both butter and a touch of oil | 25–27 mins | Crackly top, dense edges |
| Pro Tip: If you’re not sure which you prefer, go fudgy. You can always bake a few minutes longer, but once they’re overbaked, you can’t go back. |
How to make your brownies taste bakery-style
Want your brownies to taste next-level? These simple tweaks make a huge difference.
- Use melted butter, not oil. Butter adds richness and structure.
- Whisk the eggs properly. This introduces air and helps create that crackly surface.
- Add espresso powder. Just ½ teaspoon enhances chocolate flavor without tasting like coffee.
- Use dark cocoa. Dutch-process cocoa gives a smoother, deeper chocolate flavor.
- Don’t overbake. The secret to soft brownies is pulling them out while slightly underdone.
Pro Tip: Chill your brownies for an hour after cooling. It intensifies the chocolate flavor and makes slicing easier.
Serving ideas
Brownies are amazing on their own, but they can easily transform into a dessert centerpiece.
Try these combinations:
- Warm brownie + vanilla ice cream + caramel drizzle
- Layered brownie trifle with whipped cream and strawberries
- Crumbled brownie parfait with Greek yogurt for a lighter twist
- Salted brownie bites topped with sea salt flakes for a modern touch
You can also cut them into heart shapes for Valentine’s Day or small squares for a cozy girls’ night dessert platter.
How to store and freeze brownies
Brownies store beautifully, if they last that long!
- Room temperature: Keep in an airtight container for up to 4 days.
- Fridge: Up to a week, but let them reach room temperature before serving.
- Freezer: Slice, wrap individually in plastic, and store up to 3 months.
Pro Tip: Warm frozen brownies in the microwave for 15 seconds, they’ll taste freshly baked.
Common mistakes to avoid
Even easy brownie recipes can go wrong if you’re not careful. Here’s what to watch out for:
- Overmixing the batter. Leads to tough brownies. Fold gently once the flour disappears.
- Overbaking. Brownies continue cooking after leaving the oven.
- Skipping parchment paper. Makes removal and slicing messy.
- Using cold butter. It won’t mix smoothly and affects texture.
- Cutting while hot. Brownies will crumble apart. Patience is key!
Make it your own: flavor variations
This basic recipe is your canvas. Here are a few fun spins to try next time:
Peanut butter swirl brownies
Add 3 tablespoons of peanut butter and swirl it through the top before baking.
Mint chocolate brownies
Mix in ½ teaspoon of peppermint extract and top with crushed mint candies.
Salted caramel brownies
Drizzle caramel sauce over the batter and sprinkle with sea salt before baking.
Espresso brownies
Add 1 teaspoon espresso powder for mocha-style depth.
Raspberry brownies
Drop spoonfuls of raspberry jam on top for a fruity, tart contrast.
Pro Tip: Always add toppings just before baking to avoid sinking or uneven texture.
Nutrition snapshot
For one brownie (out of 12 servings):
- Calories: ~210 kcal
- Fat: 10g
- Sugar: 20g
- Protein: 3g
They’re indulgent but balanced, perfect for an occasional treat that doesn’t require store-bought mixes full of preservatives.
Fun stat: According to Food Insight, over 70% of millennials prefer homemade baked goods because they trust the ingredients and these brownies are the definition of simple, honest ingredients.
Pairing your brownies with drinks
Chocolate brownies go well with more than just milk. Try pairing them with:
- Hot coffee or espresso – enhances the cocoa flavor.
- Red wine – Merlot or Cabernet complements rich chocolate notes.
- Iced matcha latte – a trendy, earthy contrast that balances sweetness.
- Vanilla protein shake – turns dessert into a sneaky post-workout treat.
FAQs
Yes! Replace 2 eggs with ½ cup of unsweetened applesauce or 2 tablespoons of flaxseed meal mixed with 6 tablespoons of water. The texture will be slightly softer but still delicious.
You can, but you’ll lose some richness. If you must, use ½ cup vegetable oil and add a pinch more salt to enhance flavor.
Simply swap the flour for a 1:1 gluten-free baking blend. Avoid almond flour unless you tweak other ratios, since it absorbs differently.
Use less flour, don’t overbake, and make sure your butter-sugar mixture is slightly warm before adding eggs, this helps create that shiny crust.
Absolutely! Use a 9×13-inch pan and bake for about 35 minutes. Perfect for parties or gifting.
Final thoughts
This easy chocolate brownies recipe proves that simple ingredients can create something truly magical. Whether you’re baking for friends, a cozy date night, or just because you need some chocolate therapy, this recipe never disappoints.
Once you’ve mastered the basics, experiment with toppings and mix-ins to make it your signature brownie.
Because honestly, life’s too short not to enjoy warm, fudgy brownies straight from the oven.
12
servings15
minutes25
minutes210
kcalRich, fudgy, one-bowl chocolate brownies with a shiny crackly top and deep cocoa flavor, the easiest recipe you’ll ever make! Perfect for beginners and guaranteed to satisfy any chocolate craving.
Ingredients
½ cup (65g) all-purpose flour
½ cup (50g) unsweetened cocoa powder
¼ teaspoon salt
½ cup (115g) unsalted butter, melted
1 cup (200g) granulated sugar
2 large eggs
1 teaspoon vanilla extract
½ cup (90g) chocolate chips or chunks (optional)
A handful of chopped walnuts or pecans (optional)
Directions
- Preheat and prepare the pan
Preheat your oven to 350°F (175°C). Line an 8×8-inch (20x20cm) pan with parchment paper, leaving an overhang for easy removal. Lightly grease if needed. - Melt the butter
In a microwave-safe bowl, melt butter in 20-second bursts until fully melted. Let it cool slightly so it doesn’t cook the eggs later. - Mix wet ingredients
Whisk together melted butter and sugar until glossy. Add eggs one at a time, whisking well after each, then stir in the vanilla extract until the mixture thickens slightly. - Add dry ingredients
Sift in cocoa powder, flour, and salt. Gently fold together with a spatula until just combined. Do not overmix, the batter should look thick and shiny. - Add extras (optional)
Fold in chocolate chips or nuts if desired. These add a wonderful texture and extra chocolate flavor. - Bake
Spread batter evenly in the prepared pan. Bake for 20–25 minutes for fudgy brownies or 30 minutes for a more set texture. A toothpick inserted should come out with a few moist crumbs, not wet batter. - Cool and slice
Allow brownies to cool completely in the pan before slicing. For clean edges, chill for 20 minutes before cutting. Enjoy plain or topped with ice cream!