If you’ve ever seen homemade sourdough on Instagram and wondered how on earth people make bread rise without yeast packets, the answer is simple. They use a sourdough starter.
A sourdough starter is a living mixture of flour and water that captures wild yeast and good bacteria from the environment. Over time, it ferments, grows, and becomes strong enough to raise bread naturally.
Around 30 percent of home bakers in recent surveys said making a sourdough starter was their first step into fermentation, and it’s honestly easy once you know the steps.
A starter is basically your little kitchen pet. You feed it, it bubbles, and it rewards you with delicious bread.
Why start your own starter instead of buying one
You can buy a sourdough starter online, but making your own has some major benefits:
- It costs almost nothing
- It adapts to your environment, giving your bread a unique flavor
- You learn how fermentation truly works
- You control the flour and hydration
- It’s incredibly satisfying to grow something from scratch
A homemade starter becomes part of your kitchen routine, and many bakers give theirs names because they last for years. There are even people baking with 200 year old starters.
Pro Tip: If you’re nervous, remind yourself that sourdough starters are tougher than they look. Flour and water want to ferment, so your job is mostly guiding the process.
What you need before you begin
Starting a sourdough starter is simple. You only need a few tools:
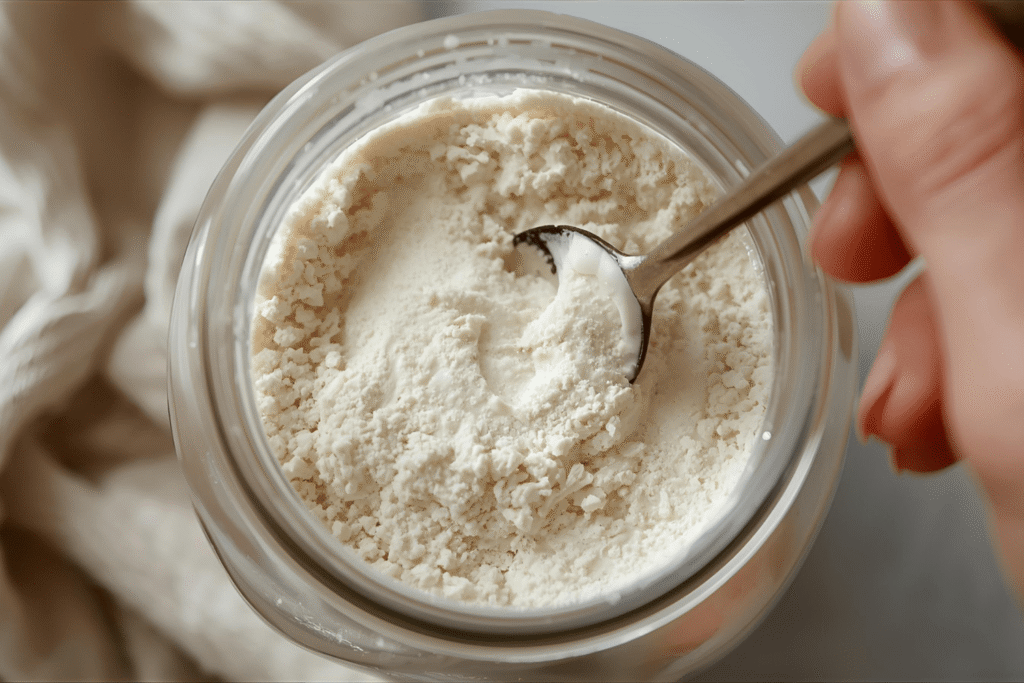
- Unbleached all purpose or bread flour
- Clean water (filtered if possible)
- A glass jar, about 500 ml or larger
- A spoon or chopstick
- A kitchen scale for accuracy
- A loose lid or breathable cloth
You don’t need anything expensive. A used jam jar works perfectly.
Why a scale is helpful
While you can measure in cups, using a scale gives you consistent results. Starters thrive on consistency, especially during the first week.
Pro Tip: If you want your starter to be really reliable, stick to one type of flour in the beginning. All purpose or bread flour is the easiest, but whole wheat can boost fermentation.
The science behind a sourdough starter
A sourdough starter works because of wild yeast and lactic acid bacteria. These microorganisms naturally live on flour and in the air. When you mix flour and water, you create the perfect environment for them to multiply.
Here’s what happens:
- Day 1 to 2: Yeasts wake up
- Day 3 to 4: Bacteria create bubbles and acidity
- Day 5: The starter becomes stable enough to rise bread
Wild yeast is slower than store bought yeast, but it’s stronger and develops deeper flavor. That signature sourdough tang? It comes from lactic acid fermentation.
Fun fact: Starters can double in size in as little as 4 hours once active.
Step by step guide: how to start a sourdough starter
This is the process most bakers use when teaching beginners. It’s simple, beginner friendly, and very reliable.
Day 1
- Add 50 g flour and 50 g water to your jar
- Mix until no dry flour remains
- Cover loosely and leave at room temperature for 24 hours
Your mixture will look like a thick paste. No bubbles yet, and that’s normal.
Day 2
You might see bubbles today, or you might not. Both are normal.
- Stir your mixture
- Add 50 g flour and 50 g water
- Stir again and cover
By stirring daily, you’re redistributing yeast and adding oxygen.
Pro Tip: Keep your starter between 21 to 24°C if you can. Fermentation slows a lot below this.
Day 3
Today is when most people see life. Bubbles, a slight rise, or a mild tangy smell are all good signs.
- Discard half of your starter
- Add 50 g flour and 50 g water
- Mix completely
What you’re doing is reducing the population so new, fresh nutrients can feed the microbes. The discard step feels strange, but it’s essential.
Day 4
Your starter should now look lively. More bubbles. More rise. Maybe a stronger smell.
- Discard 50 percent
- Feed 50 g flour and 50 g water
- Stir until combined
At this point, the starter is developing a consistent rhythm. It should rise within 6 to 12 hours.
Day 5
By day 5, your starter should be almost ready to bake with.
Signs it’s ready:
- It doubles in size within 4 to 8 hours
- It smells tangy but pleasant
- It has lots of bubbles on the sides of the jar
If it still seems sluggish, continue daily feedings for 1 or 2 more days.
How to know your starter is ready
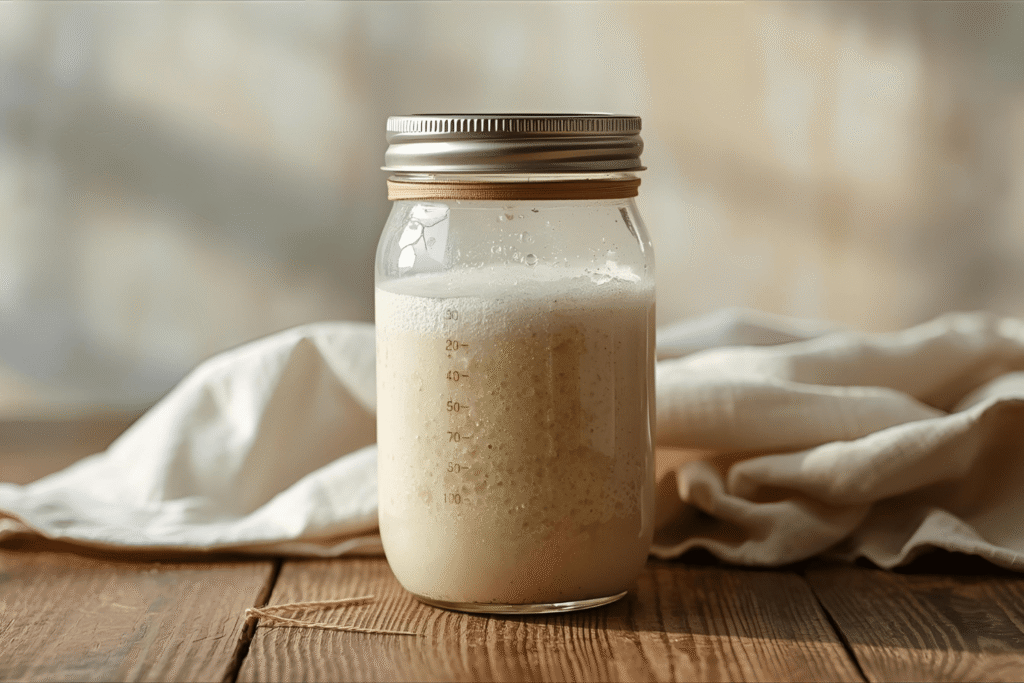
A healthy starter should look fluffy, bubbly, and airy at peak activity.
Here are the signs:
- Doubles in volume
- Looks spongy inside
- Bubbles of different sizes
- Smells like yogurt, apples, or mild vinegar
- Passes the float test (a spoonful floats in water)
The float test isn’t perfect, but it’s a helpful indicator.
If your starter rises slowly, give it a few more feedings. Some environments take longer, especially cooler kitchens.
Troubleshooting common starter problems
Every beginner runs into small issues. The good news is that most problems have simple fixes.
Hooch
Hooch is a gray or brown liquid that forms on top of the starter.
- It means your starter is hungry
- Pour it off and feed normally
It doesn’t mean your starter is ruined.
Mold
Mold is the only real danger.
Signs include:
- Pink, orange, or green spots
- Hairy growth
- Strong rotten smell
If you see mold, throw the starter out and begin again.
Weak rise
If your starter isn’t rising:
- Warm it up slightly
- Feed it twice a day
- Switch to bread flour or add 10 percent whole wheat
Whole wheat introduces more microorganisms and speeds growth.
Strange smells
A new starter might smell like cheese, nail polish, or fruit. This is normal.
Only throw it out if it smells rotten or has mold.
How to maintain and feed your starter long term
Once your starter is strong, you don’t need to feed it daily unless you bake daily.
Weekly feeding
If kept on the counter:
- Feed once a day
- Keep a small amount
- Adjust flour and water to keep consistency
Refrigerated maintenance
Most people store their starter in the fridge.
To maintain:
- Feed once a week
- Keep the jar loosely covered
- Bring it to room temperature before baking
Refrigeration slows fermentation by 80 to 90 percent, meaning less upkeep.
Reviving a neglected starter
Even if you forget about your starter for weeks, it can often be revived.
Try this:
- Remove any dark hooch
- Keep a tablespoon of the starter
- Feed 50 g flour and 50 g water
- Repeat daily for 3 to 5 days
Most starters bounce back quickly.
Pro Tip: Always keep a backup dried starter in your pantry. Spread a thin layer on parchment paper, let it dry, crumble, and store in a jar.
Creative ways to use discard
Sourdough discard is the portion you remove before feeding. Instead of throwing it away, you can bake with it.
Here are fun ideas:
- Pancakes
- Waffles
- Crackers
- Pizza dough
- Banana bread
- Muffins
- Pretzels
- Cookies
Discard recipes help reduce waste and add a mild tangy flavor. Some bakers cook more with discard than with active starter.
FAQs
Most starters take 5 to 7 days to become active. Cooler homes might need up to 10 days.
Bread flour or all purpose flour works well. Whole wheat kickstarts fermentation, but it can create a thicker starter.
Yes. Once stable, your starter can adapt to new flours. Just introduce them gradually.
No. You can save it in the fridge and use it in baked goods like pancakes and muffins.
It might be too cold or too wet. Try feeding with warm water or switching to a 1:1 ratio with bread flour.
A healthy starter doubles in size, smells pleasant, and bubbles actively during feeding cycles.
Final thoughts
Starting a sourdough starter is one of the most rewarding kitchen projects you can do. Not only are you creating the foundation for incredible homemade bread, but you’re also learning how simple and beautiful fermentation can be.
Once you understand how to start a sourdough starter and maintain it, the process becomes almost meditative. A few minutes a day of feeding turns into a lifelong baking companion. Whether you want rustic loaves, soft sandwich bread, or fun discard pancakes, your starter will be at the heart of it.
If you ever feel overwhelmed during the first few days, remember that every single successful sourdough baker started exactly where you are now. A starter might look quiet or unpredictable at first, but once it finds its rhythm, it becomes one of the most reliable things in your kitchen. You’ll quickly learn its personality, how fast it rises, and when it’s at its peak. Before long, feeding your starter will feel almost effortless.
Once your sourdough journey begins, you’ll open the door to homemade bread, pastries, and endless cozy weekend baking moments. It’s truly worth the patience.