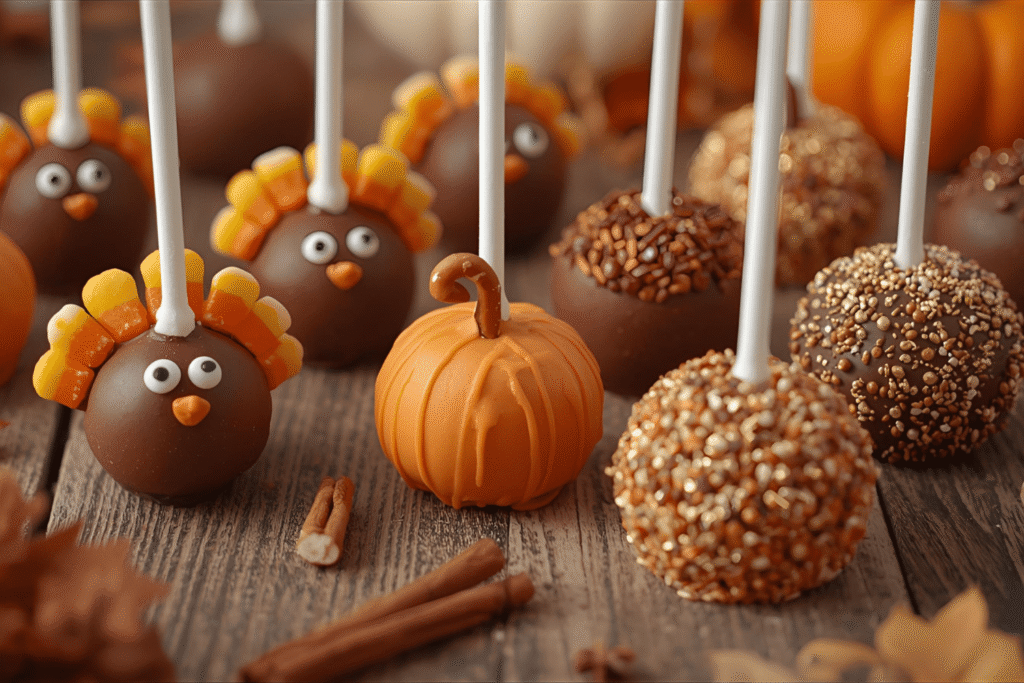
Thanksgiving cakepops are adorable bite sized desserts made from crumbled cake mixed with frosting, rolled into balls, dipped in chocolate, and decorated with fall inspired colors. Think warm cinnamon oranges, rich chocolate browns, deep cranberry reds, and all those cozy Thanksgiving vibes we love.
They are perfect when you want something festive without baking an entire pie, and they’re just fancy enough to feel special while still being beginner friendly.
Cakepops have become a modern Thanksgiving trend because they fit into a party without the pressure of serving a full dessert course. They’re cute, handheld, and totally Instagrammable.
Why thanksgiving cakepops are the perfect holiday treat
Thanksgiving is already a marathon of casseroles, sides, and carb heavy comfort foods. Adding a full blown dessert table can sometimes feel overwhelming. Cakepops solve that problem beautifully.
They’re mess free, budget friendly, and way easier to serve to a crowd. You can bring them to Friendsgiving, family gatherings, or office potlucks, and they travel incredibly well.
Plus, they’re fun to make. Whether you’re a baking beginner or someone who already owns 14 piping tips and a digital scale, cakepops are surprisingly forgiving.
Quick stats that show cakepops are surprisingly popular
Recent food trend data shows:
- Over 4.6 million monthly Google searches globally for cakepop related terms.
- Pinterest saves for cakepop recipes rise by nearly 30 percent every November.
- Mini dessert recipes receive 3x more engagement on TikTok during holiday months.
Translation: people love cute desserts, especially during Thanksgiving season. This makes your thanksgiving cakepops not only delicious but also highly shareable for social media.
Pro Tip: If you’re making these for a party, double your batch. They disappear faster than stuffing on Thanksgiving morning.
Ingredients you will need
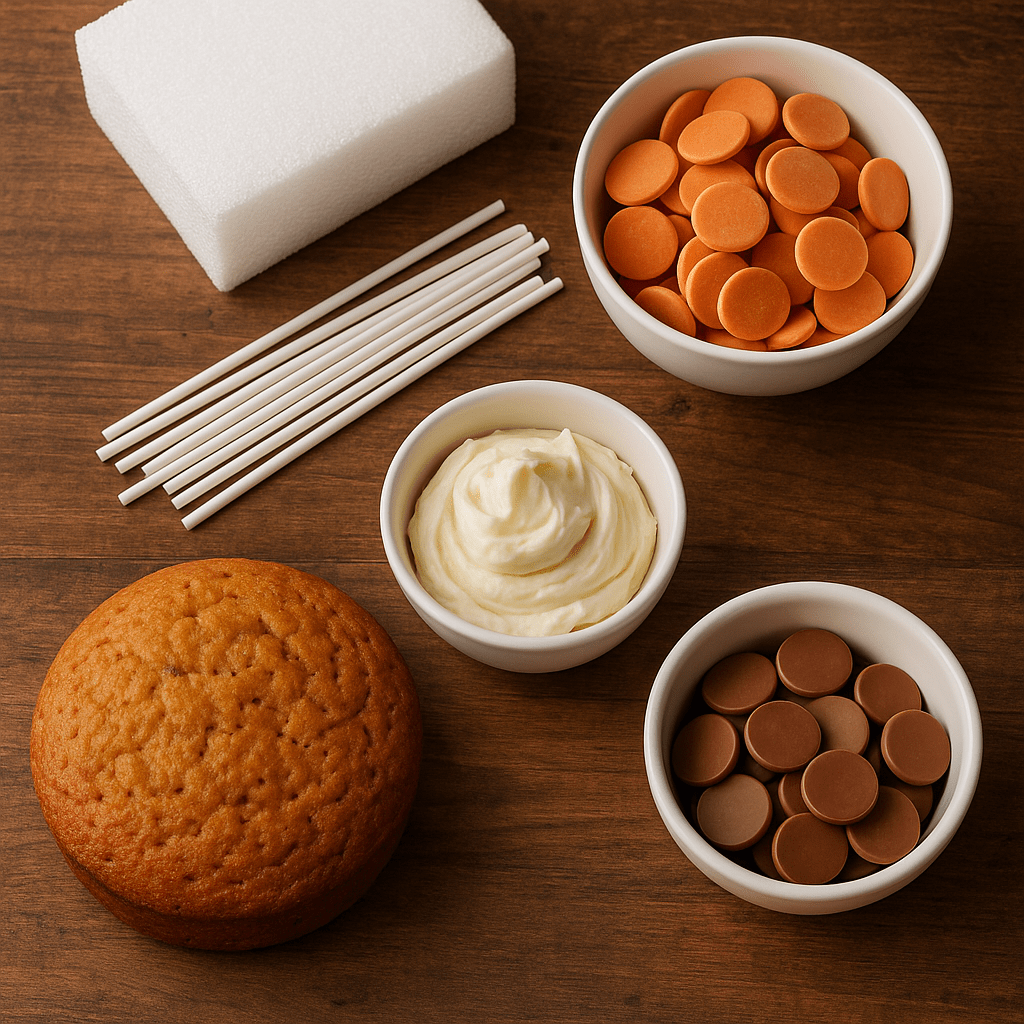
You can make thanksgiving cakepops with simple ingredients you already know. Here’s the full list:
Base ingredients
- 1 baked cake (vanilla, spice cake, or chocolate are all great)
- 1/3 to 1/2 cup frosting
- 2 cups candy melts or chocolate coating
- Lollipop sticks
- A block of styrofoam (for drying pops)
Optional add ons for decorating
- Fall colored sprinkles
- Mini edible leaf decorations
- Orange and brown candy melts
- Crushed nuts
- Edible shimmer dust
- Mini marshmallows
- Pretzel sticks (for turkey legs or stems)
Pro Tip: Using a boxed cake mix is totally fine and makes the process so much faster.
How to make thanksgiving cakepops step by step
Cakepops feel fancy but they’re genuinely simple once you understand the rhythm. The secret is not rushing the crumbling, mixing, chilling, and dipping steps. Each part plays a role in getting that perfectly smooth, bakery style finish that holds up beautifully for your Thanksgiving celebration. Here’s the full breakdown so nothing feels confusing.
Shaping the cakepops
Getting the texture right at this stage determines everything else later, so take your time.
- Crumble your baked cake until no chunks remain.
Use your hands or a mixer. You want a fine, sand like texture, not big crumbs. If even a few larger pieces remain, your cakepops can crack later when dipped. A good test is to pinch a bit of the crumbled cake between your fingers. It should compress easily. - Add frosting one spoonful at a time until the mixture resembles cookie dough.
You should not dump all your frosting in at once. Too much frosting makes mushy cakepops that slide off the stick. Start with 2 tablespoons, mix thoroughly, then add more as needed. The mixture should feel soft but not sticky, and it should hold its shape when you roll a test ball. - Roll the mixture into 1 inch balls.
This is the standard size for cakepops. Anything larger becomes heavy on the stick. If you want uniform results, use a small cookie scoop. Lightly grease your hands with a tiny bit of butter or oil to prevent sticking. - Place the cake balls on a lined baking tray and freeze for 10 to 15 minutes.
You don’t want the balls to freeze solid, but they should firm up enough to stay round. Soft cake balls will fall apart when inserting the stick, and overly frozen ones will crack when dipped in warm chocolate.
Freezing at this stage keeps your pops from sliding off the sticks later, which is one of the most common cakepop complaints. Chilled cake balls also help the chocolate coating set faster and smoother.
Dipping the cakepops
This is the step that intimidates most beginners, but once you get the hang of it, dipping becomes incredibly satisfying.
- Melt your candy melts in a microwave safe bowl.
Heat in 20 to 30 second intervals, stirring well each time. Candy melts scorch easily if you overheat them. You want a silky consistency that pours off the spoon in a smooth ribbon. If the mixture is too thick, stir in a teaspoon of coconut oil. - Dip the end of a lollipop stick into the melted coating and insert it halfway into the cake ball.
This dipped end acts like edible glue. Push the stick in about halfway, not all the way through. If you push too far, the ball can crack or fall apart later. - Freeze again for about 5 minutes to secure the stick.
This quick chill keeps the stick firmly attached so your cakepop doesn’t slip or rotate when dipping. If you’re working in a warm kitchen, this quick chill is essential. - Dip the cakepop straight down into the chocolate, then lift straight out.
Avoid swirling or stirring the cakepop in the chocolate. Straight down and straight back up gives the smoothest coating. Gently tap the stick on the rim of the bowl while rotating the pop to let excess chocolate drip off evenly. - Hold the cakepop upside down for a few seconds to help the coating settle.
This helps the chocolate smooth out before it sets. If you see small bubbles, gently tap again to release them.
Pro Tip: Add a teaspoon of coconut oil to your melted candy for a smoother dip and a more professional looking finish.
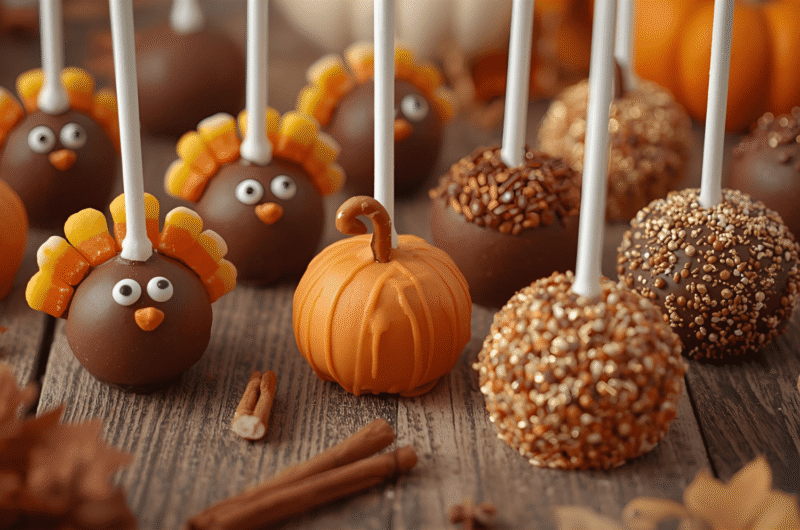
Decorating ideas
This is where thanksgiving cakepops become extra fun, and you can get as creative or simple as you want. Fall is full of warm colors and cozy textures, making it the perfect holiday for themed cakepops.
Try any of these:
- Turkey cakepops
Make the coating chocolate brown. Add candy corn for feathers, pretzel pieces for wings, and mini edible eyes. Use a tiny dot of orange melt for the beak. These are showstoppers for kids and adults. - Pumpkin cakepops
Dip in orange candy melts and press a pretzel stick into the top before the coating sets. Add tiny green icing leaves for extra cuteness. These look gorgeous on a fall dessert table. - Fall sparkle pops
Coat in white or milk chocolate and roll in burnt orange, cranberry red, or gold sprinkles. These give a more elegant Thanksgiving feel and pair beautifully with metallic decor. - Harvest swirl pops
After dipping in your base color, drizzle a contrasting color of candy melt in thin lines across the pop. Use a toothpick to lightly swirl the colors to create a marbled harvest effect. - Cinnamon sugar pops
Dip in white chocolate and sprinkle lightly with cinnamon sugar before the coating sets. These taste like a mini churro in cakepop form.
Pro Tip: If your decorations slide off, your coating is too warm. Let it cool for 2 to 3 minutes, then try again. Decorations stick best when the coating is thickening but still tacky.
Thanksgiving cakepop flavor ideas
You can go beyond classic vanilla. Here are some flavors that instantly match Thanksgiving energy:
- Pumpkin spice with cream cheese
- Apple cinnamon cake with caramel drizzle
- Maple brown sugar
- Salted caramel chocolate
- Gingerbread spice
- Chocolate hazelnut
- Cranberry orange
These warm fall flavors are comforting, seasonal, and always crowd pleasing.
How to store and freeze your cakepops
Storing cakepops properly keeps them tasting fresh for up to several days.
Room temperature:
Up to 2 days in an airtight container.
Refrigerator:
Up to 1 week. Let them come to room temp before serving for the softest texture.
Freezer:
Cakepops freeze beautifully for up to 6 weeks. Wrap individually, place in a freezer safe bag, and thaw overnight in the fridge when ready.
Pro Tip: Choose sprinkles that don’t bleed if you plan to freeze your cakepops.
Troubleshooting common cakepop issues
Even experienced bakers run into cakepop challenges. Here’s how to fix the most common ones.
Cakepops cracking
Cake balls were too cold or your coating was too hot. Match their temperatures more closely next time.
Cakepops falling off the stick
Too much frosting, or the chilling step was skipped. Add extra cake crumbs or chill longer.
Lumpy coating
Your chocolate overheated. Reheat slowly and add a tiny bit of coconut oil.
Cakepops are too mushy
Too much frosting was added. Add additional cake crumbs to balance the texture.
Fun ways to serve thanksgiving cakepops
Presentation elevates the overall experience. Try these:
- Arrange them in a mini pumpkin shaped basket
- Use them as edible place cards with guest names
- Add them to a tiered fall dessert stand
- Display in mason jars filled with candy corn
- Wrap individually as cute party favors
Pro Tip: Hosting a Friendsgiving? Set up a cakepop decorating bar. It’s interactive, creative, and always a hit.
FAQs
Pumpkin spice, chocolate, and apple cinnamon are the most popular choices.
Yes. You can prepare them the day before and store in the fridge. Decorate on the same day for the best look.
Yes, but candy melts give the smoothest finish and firm up faster.
You added too much frosting. Add more cake crumbs or refrigerate longer.
Up to one week in the fridge or six weeks in the freezer.
Definitely. Kids love making and decorating them.
Final thoughts
Thanksgiving cakepops are festive, cute, and easier to make than most holiday desserts. Whether you’re heading to a big family dinner or a cozy Friendsgiving, these little treats bring color, fun, and a whole lot of personality to the table.
They’re budget friendly, mess free, and guaranteed to get compliments.
If you want help turning this recipe into a Pinterest graphic, printable card, or step by step visual guide, just let me know.
20
servings25
minutes1
minute140
kcalCute, festive Thanksgiving cakepops made with crumbled cake, frosting, and candy melts. Perfect for holiday parties, Friendsgiving, or a fun family activity.
Ingredients
Baked vanilla, spice, or chocolate cake
1/3 to 1/2 cup frosting
2 cups candy melts or chocolate coating
Lollipop sticks
Block of styrofoam (for drying cakepops)
- Optional Add Ons
Fall colored sprinkles
Edible leaf decorations
Additional candy melt colors
Pretzel sticks
Crushed nuts
Mini edible eyes
Edible shimmer dust
Directions
- Crumble the baked cake into fine crumbs until no large pieces remain.
- Mix in frosting one spoonful at a time until the texture resembles soft cookie dough.
- Roll the mixture into 1 inch balls and place them on a lined tray.
- Freeze for 10 to 15 minutes until firm but not solid.
- Melt candy melts in the microwave using 20 to 30 second intervals, stirring between each.
- Dip the tip of each lollipop stick into the melted coating and insert into each cake ball.
- Freeze again for 5 minutes to secure the sticks.
- Dip each cakepop straight down into the melted candy and lift straight up for a smooth coat.
- Rotate gently to remove excess coating and let them dry upright in the styrofoam block.
- Decorate with sprinkles, candy corn, pretzels, or drizzle additional melted candy as desired.