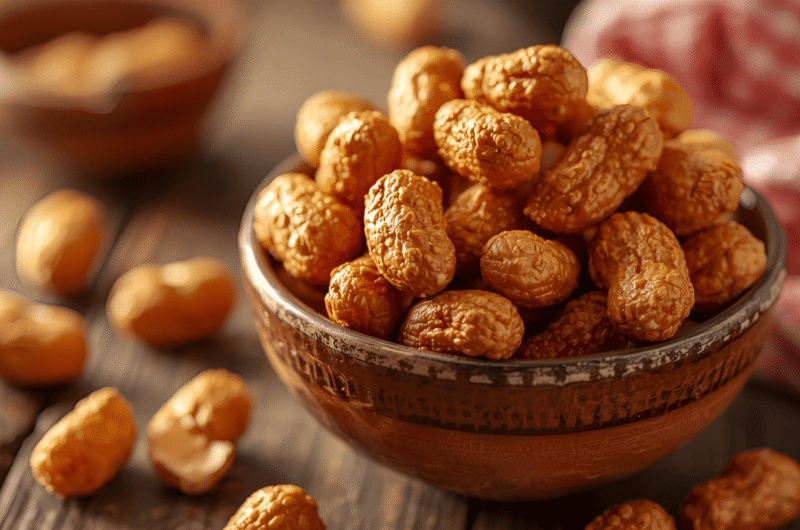
Few snacks are as satisfying as a bowl of crunchy coated peanuts. They’re the kind of treat you can’t stop reaching for, crispy on the outside, nutty and rich on the inside, and perfect for everything from movie nights to party spreads.
The best part? You don’t need to buy those pricey store-bought versions. With this simple coated peanuts recipe, you can whip up a batch at home using pantry staples. The result is fresher, customizable, and just as addictive (if not more!).
In this guide, we’ll cover the step-by-step recipe, flavor variations, pro cooking tips, and everything you need to know to make your coated peanuts taste like a snack straight out of your favorite street market.
Why coated peanuts are so popular
Coated peanuts aren’t just a tasty snack, they’re a global favorite. In Southeast Asia, you’ll often find street vendors selling them by the bag. In Nigeria, they’re known as peanut burgers and often sold as a quick energy boost. And in the US, candied or spiced nuts are a common holiday treat.
Some fun snack stats:
- The average American consumes around 7 pounds of peanuts per year, according to the National Peanut Board.
- Globally, the peanut market is worth over $50 billion annually, and coated peanuts are a big chunk of that thanks to their snack appeal.
- Homemade coated peanuts often cost 50–70% less than buying them pre-packaged.
It’s no surprise they’re loved across cultures, they’re crunchy, protein-packed, and incredibly versatile.
Pro Tip: Homemade coated peanuts stay fresh longer than you think. Stored in an airtight container, they’ll keep their crunch for up to 2 weeks.
Ingredients you’ll need for coated peanuts recipe
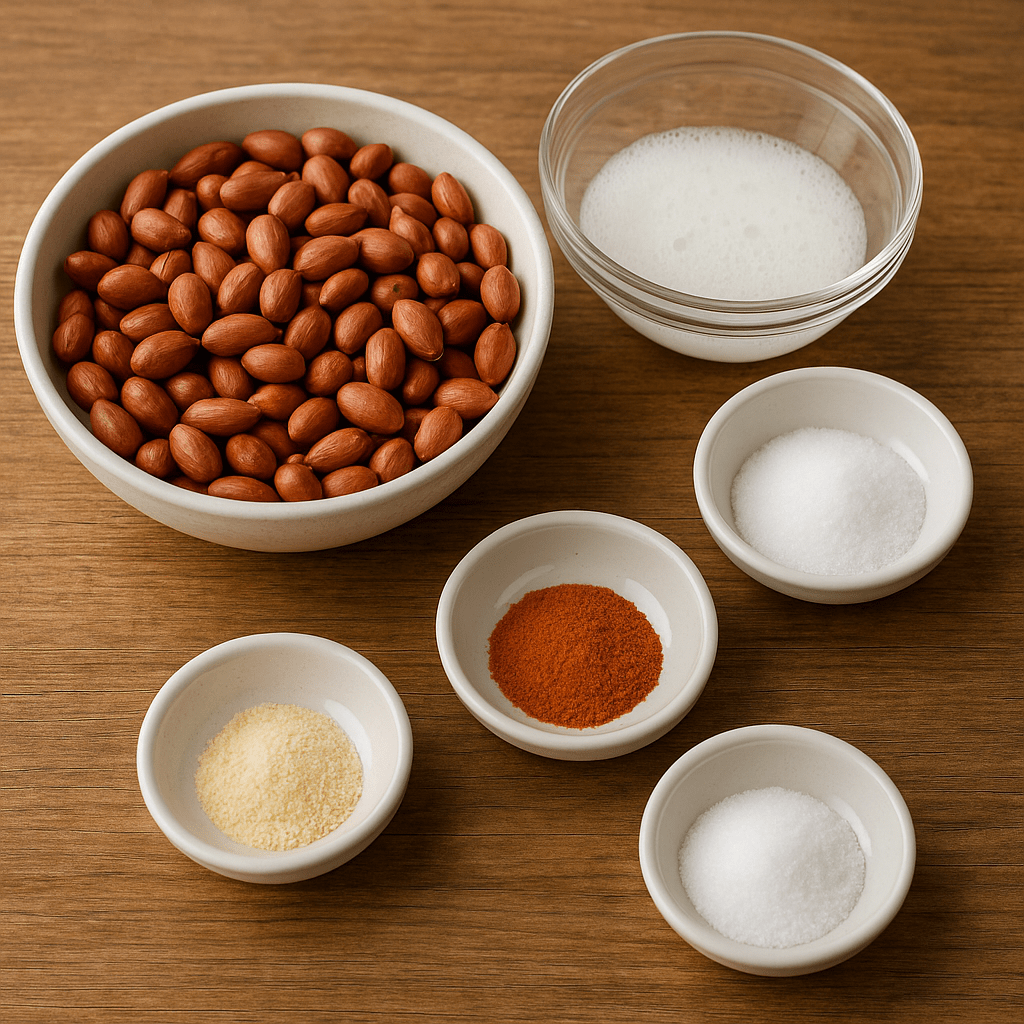
This recipe makes about 4 cups of coated peanuts, perfect for sharing (or not sharing).
For the peanuts
- 2 cups raw shelled peanuts (skin-on or skinless)
- 1 egg white (for binding)
- 2 tbsp sugar (optional, for sweetness)
- 1 tsp salt
- ½ tsp garlic powder (optional, for savory flavor)
- ½ tsp chili powder or paprika (optional, for heat)
For the coating
- 1 cup all-purpose flour
- 2 tbsp cornstarch (for extra crispiness)
- ½ tsp baking powder
- ½ cup water (adjust as needed)
- 2 tbsp oil (vegetable or peanut oil)
For frying
- 2–3 cups vegetable or peanut oil
Pro Tip: Cornstarch is the secret ingredient that makes the coating extra crispy. Don’t skip it if you love that signature crunch.
Step-by-step coated peanuts recipe
This recipe takes about 40 minutes total, including prep and frying time. The process is simple, but a little attention to detail will give you that irresistible crunch every time.
Step 1: Prepare the peanuts
- Spread your raw peanuts evenly on a large tray or baking sheet. If they feel damp or have condensation (common if you’ve rinsed or thawed them), pat thoroughly with paper towels until dry.
- Dry peanuts are key, excess moisture can make the coating slip off during frying.
- In a medium bowl, whisk one egg white until frothy. Toss the peanuts in the egg white, ensuring each nut is lightly but evenly coated. This step is your natural edible glue, it helps the flour mixture cling to the peanuts later.
Pro Tip: If you don’t want to use egg white, you can swap it for a slurry of cornstarch and water, but egg white tends to give the crispiest, most reliable results.
Step 2: Season the flour
- In a mixing bowl, combine 1 cup all-purpose flour, 2 tablespoons cornstarch, and ½ teaspoon baking powder. This trio is your crispiness formula: flour for structure, cornstarch for crunch, and baking powder for that light, airy texture.
- Stir in 1 teaspoon salt plus any spices of your choice. Garlic powder, chili powder, smoked paprika, curry powder, or even cinnamon and sugar for a sweet version all work beautifully.
- If you’re making a dessert-style snack, add 2 tablespoons of sugar to the flour mix.
Pro Tip: Don’t be afraid to get creative with flavor combos. Think “barbecue peanuts” with paprika and brown sugar or “Thai-inspired” with chili powder and lime zest added later.
Step 3: Make the batter
- Slowly pour in ½ cup of water and 2 tablespoons of oil into the flour mixture, whisking as you go. The batter should come together into a smooth, lump-free consistency.
- You’re aiming for a batter that’s thicker than pancake batter but not as thick as dough. It should coat a spoon and drip slowly, which ensures it sticks to peanuts without sliding off.
- If your batter is too runny, add a bit more flour. Too thick? Add a splash of water. Adjust until it feels just right.
Pro Tip: Using a whisk instead of a spoon helps prevent flour clumps and creates a smoother batter.
Step 4: Coat the peanuts
- Add the egg-white-coated peanuts into the bowl of batter. Stir gently until every peanut is completely covered. Don’t rush, making sure they’re coated evenly ensures you won’t get bare patches after frying.
- To avoid clumps, sprinkle a tablespoon of flour over the coated peanuts and gently toss them with your hands or a fork. This light dusting keeps them from sticking together during frying.
Pro Tip: If you want extra-crunchy peanuts, you can repeat the coating step: dip once in batter, dust with flour, then dip again. Double-coating is a game-changer for people who love an extra thick crunch.
Step 5: Fry to perfection
- Pour enough oil into a deep pan or wok so that the peanuts can be fully submerged (about 2–3 cups). Heat it to 350°F (175°C). Use a kitchen thermometer if possible, maintaining oil temperature is the secret to perfectly crispy peanuts.
- Test the oil by dropping in a bit of batter, if it sizzles and rises immediately, it’s ready.
- Fry peanuts in small batches (½–1 cup at a time). Overcrowding the pan lowers the oil temperature, which makes the peanuts greasy instead of crisp.
- Stir gently with a slotted spoon or chopsticks to keep them separated and to ensure even cooking. Fry for about 4–5 minutes per batch until golden brown and crunchy.
- Use a slotted spoon to lift them out and transfer to a plate lined with paper towels to drain excess oil.
Pro Tip: If your peanuts start to darken too quickly, lower the heat slightly. Perfect frying is about steady temperature, not rushing.
Step 6: Cool and store
- Spread the freshly fried coated peanuts in a single layer on a wire rack or tray. Let them cool completely, this step is crucial for locking in the crispiness.
- Once cooled, transfer the peanuts into an airtight container or jar. Store at room temperature in a cool, dry place for up to 2 weeks.
Pro Tip: Avoid storing while still warm. Trapped steam creates condensation, which softens the coating and ruins that hard-earned crunch.
Flavor variations for coated peanuts
One of the best things about making your own coated peanuts is the endless flavor options. Here are a few ideas:
Sweet coated peanuts
- Add cinnamon and sugar to the flour mixture.
- Drizzle with melted chocolate after frying for a candy-like treat.
Savory coated peanuts
- Add garlic powder, onion powder, and paprika for a bold, smoky flavor.
- Toss with dried herbs like rosemary or thyme for a gourmet twist.
Spicy coated peanuts
- Use chili flakes or cayenne pepper in the flour mix.
- For a Southeast Asian flair, add a spoonful of curry powder.
Asian-inspired coated peanuts
- Swap some of the flour for rice flour for a lighter crunch.
- Season with soy sauce powder or sesame seeds for an umami kick.
Pro Tip: Divide your peanut batches and try two flavors at once. Half sweet, half savory makes a fun snack mix.
Why homemade coated peanuts are better than store-bought
Sure, buying a bag is easy, but making them at home has its perks:
- Freshness: Homemade batches don’t sit on store shelves for weeks.
- Customization: Control the flavors, sweetness, and spice levels.
- Savings: Raw peanuts are inexpensive compared to branded snack packs.
- Healthier options: Adjust the salt, sugar, or frying oil to suit your diet.
According to a study in Food Quality and Preference, people are more likely to enjoy snacks they make themselves because of the sense of control and creativity involved. That makes homemade coated peanuts not just tastier but also more satisfying.
Pairing ideas for coated peanuts
These crunchy treats aren’t just for snacking out of the jar. Here’s how to enjoy them:
- Serve in bowls at parties or game nights.
- Add to a charcuterie board for a crunchy element.
- Toss into salads for texture.
- Use as a topping for stir-fried noodles or fried rice.
- Pair with a cold beer, soda, or sparkling water for the ultimate movie snack.
Pro Tip: If you’re hosting, put coated peanuts in little paper cones. It looks cute and keeps portions tidy.
Storing and shelf life
Proper storage is the difference between peanuts that stay crispy and ones that go soft.
- Keep in an airtight container at room temperature for up to 2 weeks.
- For longer storage, freeze them in ziplock bags for up to 3 months. Just reheat in an oven for 5 minutes to bring back the crunch.
- Avoid storing in humid environments, as moisture softens the coating.
FAQs
Yes, you can! Spread coated peanuts on a baking tray and bake at 350°F (175°C) for 20–25 minutes, stirring halfway through. They won’t be quite as crunchy as fried ones but are a healthier option.
Not necessarily. Skins add extra fiber and flavor, but if you prefer a cleaner look, you can rub the peanuts in a towel to remove them.
Yes, substitute egg white with a slurry of water and cornstarch. It won’t bind as strongly, but it still works.
Dust the coated peanuts with a little extra flour and fry in small batches, stirring gently to separate them.
In moderation, yes! Peanuts are high in protein and good fats. Frying adds calories, but you can lighten the recipe by baking or air-frying.
Final thoughts
A coated peanuts recipe is one of those simple kitchen wins that pay off big time. With just a handful of pantry staples, you can create a crunchy, flavorful snack that rivals anything in the snack aisle.
Whether you like them sweet, savory, or spicy, coated peanuts are endlessly customizable and perfect for sharing, or keeping all to yourself. Once you make them at home, you may never go back to store-bought again.
So grab some raw peanuts, heat up the oil, and get ready for the most addictive snack you’ll ever make.
4
servings15
minutes25
minutes300
kcalA crunchy and addictive snack made with peanuts coated in a seasoned flour batter and fried until golden. Perfect for parties, movie nights, or just casual munching.
Ingredients
2 cups raw shelled peanuts (skin-on or skinless)
1 egg white (for binding)
2 tbsp sugar (optional, for sweetness)
1 tsp salt
½ tsp garlic powder (optional, savory version)
½ tsp chili powder or paprika (optional, for heat)
1 cup all-purpose flour
2 tbsp cornstarch
½ tsp baking powder
½ cup water (adjust as needed)
2 tbsp vegetable oil (for batter)
2–3 cups vegetable or peanut oil (for frying)
Directions
- Prepare the peanuts: Spread raw peanuts on a tray and pat them dry with a paper towel. Place in a bowl and toss with lightly whisked egg white until coated.
- Make the flour mix: In a separate bowl, whisk together flour, cornstarch, baking powder, salt, and optional spices. Stir in sugar if making a sweet version.
- Mix the batter: Gradually add water and 2 tbsp oil into the flour mixture until you get a thick, smooth batter. It should cling to the peanuts without dripping off.
- Coat the peanuts: Add the egg-white-coated peanuts to the batter. Stir well to coat evenly. To prevent clumps, dust with a little flour and separate with your hands.
- Fry the peanuts: Heat frying oil in a deep pan to 350°F (175°C). Fry peanuts in small batches, stirring gently to avoid sticking, until golden and crispy (about 4–5 minutes per batch).
- Drain and cool: Remove with a slotted spoon and drain on paper towels. Spread in a single layer and let cool completely.
- Store: Once cooled, store in an airtight jar or container for up to 2 weeks.