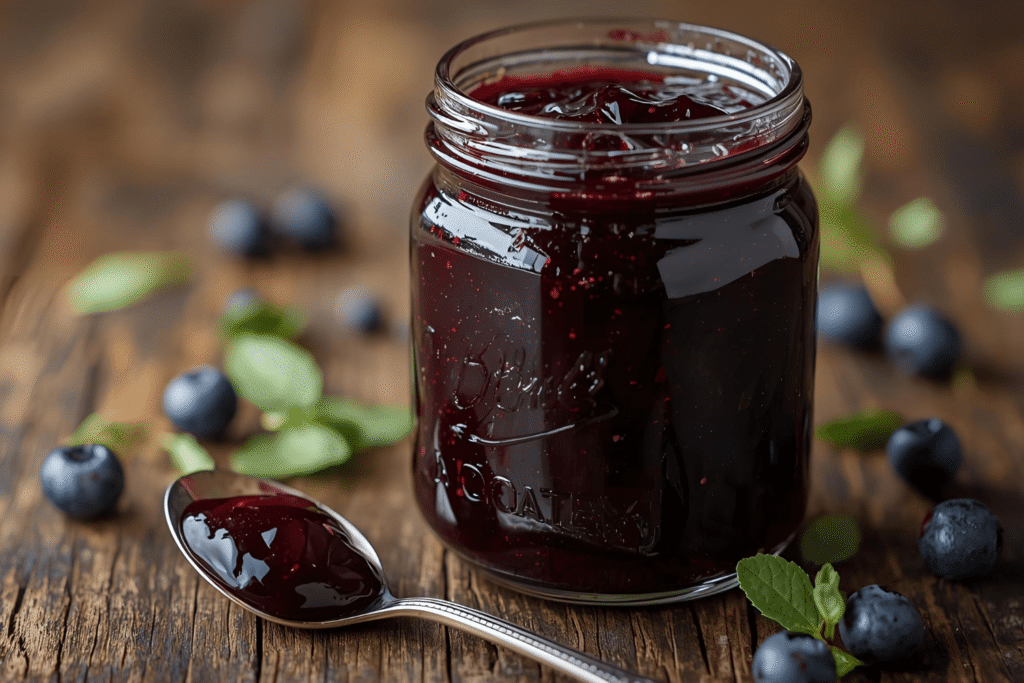
If you’re looking for a way to turn those deep purple elderberries into something sweet, tangy, and a little magical, this elderberry jelly recipe is exactly what you need. Not only does it taste amazing on toast or pancakes, but it’s also packed with immune-boosting antioxidants that make you feel good from the inside out.
Whether you’ve just picked your own berries or bought them frozen, making homemade elderberry jelly is simpler than you might think. Let’s dive into how to make it perfectly every time, plus some fun tips for getting creative with flavors and using your jelly in unexpected ways.
Why you’ll love this elderberry jelly recipe
Elderberries have been used for centuries as a natural remedy for colds and flu. In fact, studies show elderberries can reduce flu symptoms by up to four days compared to placebo treatments (source: Journal of International Medical Research).
But beyond the health benefits, this jelly is:
- Beautifully rich and jewel-toned, perfect for gifting or displaying on your breakfast table
- Naturally packed with vitamin C and antioxidants
- Easy to make, even for beginners
- Perfect for year-round enjoyment, especially when you’re craving something fruity and comforting in winter
Pro Tip: If you’re planning to make several jars, double the recipe and store extras in the pantry, they make adorable homemade gifts during the holidays.
What you’ll need
Before you begin, gather everything you’ll need for this elderberry jelly recipe. Preparation makes the process smooth and stress-free.
Ingredients
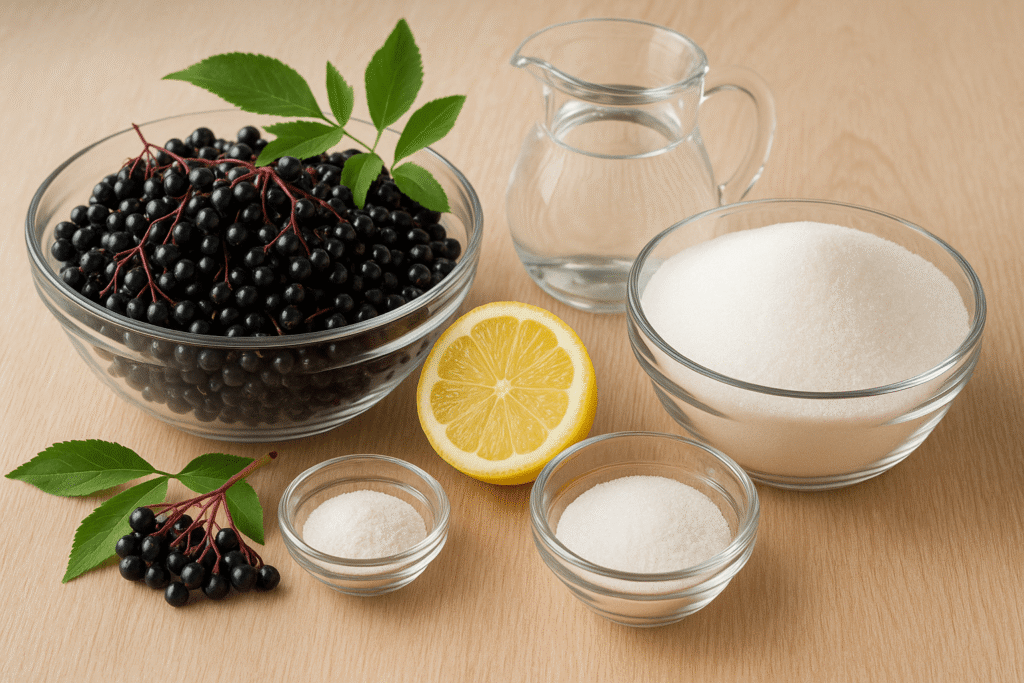
- 3 pounds fresh or frozen elderberries (around 8–10 cups)
- 4 cups granulated sugar
- 1 package (1.75 oz) powdered pectin
- 1/4 cup lemon juice (freshly squeezed, if possible)
- 1 cup water
Equipment
- Large pot
- Jelly bag or cheesecloth
- Fine-mesh strainer
- Sterilized canning jars with lids
- Ladle and funnel
- Water bath canner or large deep pot
Preparing the elderberries
Step 1: Remove stems carefully
Elderberries grow in clusters, and their stems and leaves are mildly toxic when raw. Carefully remove the berries using a fork or by hand. This step might take a little time, but it’s worth it for that clean, pure flavor.
Pro Tip: Freeze the clusters for about 15 minutes before destemming. The berries pop off much more easily when slightly frozen!
Step 2: Cook the berries
Place the berries and 1 cup of water into a large pot. Bring to a gentle simmer and cook for about 10–15 minutes, stirring occasionally. The heat will help release the juice and break down the fruit.
Once cooked, pour the mixture through a jelly bag or cheesecloth-lined strainer. Let it drip naturally for a few hours or overnight. Avoid squeezing the bag, it can make the jelly cloudy.
Making the jelly
Step 3: Measure your juice
You should end up with about 3 to 4 cups of elderberry juice. If you’re a little short, you can add a bit of water to reach that amount.
Step 4: Mix and cook
Return the juice to the pot and add lemon juice and pectin. Bring the mixture to a rolling boil over high heat, stirring constantly.
Add the sugar all at once, then return to a boil. Boil hard for 1 full minute, stirring continuously to prevent burning.
You’ll notice the mixture thickens slightly and becomes glossy, that’s when you know it’s ready!
Checking for the perfect jelly set
If you’re new to jelly-making, the set might sound intimidating, but it’s easy to test.
Option 1: The spoon test
Dip a cold spoon into the jelly and lift it sideways. If the jelly runs off in thick sheets instead of droplets, it’s ready.
Option 2: The plate test
Place a small plate in the freezer for 5 minutes. Drop a little jelly onto it, wait a few seconds, and push it gently with your finger. If it wrinkles slightly, you’ve nailed it!
Pro Tip: If your jelly doesn’t set the first time, don’t panic. Reboil it for a few more minutes and test again. Sometimes altitude, humidity, or berry ripeness can affect pectin levels.
Canning your elderberry jelly
Once your jelly is ready, it’s time to seal it up for long-term storage.
- Pour the hot jelly into sterilized jars, leaving about 1/4 inch of space at the top.
- Wipe the rims clean to ensure a proper seal.
- Place the lids on and tighten gently.
- Process the jars in a boiling water bath for 10 minutes.
Afterward, let the jars cool completely. You’ll hear that satisfying pop sound as they seal, one of the best feelings in home canning!
Pro Tip: Label your jars with the date. Properly canned elderberry jelly can last up to 12 months in a cool, dark place.
Flavor variations to try
One of the joys of this recipe is how customizable it is. Here are a few delicious twists to keep things interesting:
Elderberry and apple jelly
Add 1 cup of unsweetened apple juice before boiling. The apple adds natural sweetness and pairs beautifully with elderberries.
Spiced elderberry jelly
Add a cinnamon stick, a few cloves, or a pinch of nutmeg while cooking the berries for a cozy autumn version.
Elderberry and blueberry blend
Use half elderberries and half blueberries for a vibrant, antioxidant-rich twist that’s slightly milder in flavor.
Creative ways to use elderberry jelly
This isn’t just for toast! Here are some creative ways to use your homemade jelly:
- Drizzle over pancakes or waffles for a fruity kick
- Add a spoonful to hot tea for a soothing winter drink
- Glaze roasted chicken or pork with elderberry jelly mixed with balsamic vinegar
- Stir into yogurt or oatmeal for a morning antioxidant boost
- Pair with cheese like brie or goat cheese on crackers for an elegant appetizer
Pro Tip: Mix one tablespoon of elderberry jelly with sparkling water for a refreshing immune-boosting mocktail!
Storing and shelf life
If you’ve canned the jelly properly, it can be stored for up to a year in your pantry. Once opened, keep it in the fridge and consume within 3–4 weeks.
If you prefer not to can, you can refrigerate it immediately after cooking and enjoy it fresh for up to 2 weeks or freeze it for up to 6 months.
Health benefits of elderberries
Elderberries aren’t just delicious, they’re incredibly good for you. Here’s why this jelly packs a healthy punch:
- Rich in antioxidants: Elderberries contain flavonoids that help fight oxidative stress.
- Supports immunity: Studies have found that elderberry extracts can reduce cold duration by about 50%.
- Anti-inflammatory: They help reduce inflammation and may ease joint pain.
- Heart-healthy: Their anthocyanins may lower cholesterol and support cardiovascular health.
Of course, jelly contains sugar, so enjoy it in moderation, but it’s still a much better choice than artificial jams or syrups.
Troubleshooting common jelly problems
Even experienced canners sometimes hit snags. Here are a few quick fixes:
Problem: Jelly didn’t set properly
Solution: Reboil with a little extra pectin or cook longer. Altitude and humidity can affect setting time.
Problem: Jelly is too firm
Solution: Stir in a few tablespoons of hot water until it softens.
Problem: Cloudy jelly
Solution: Next time, avoid pressing the juice bag. Let it drip naturally for a clear finish.
Pro Tip: Always label jars that didn’t set properly as “syrup” instead of tossing them, they make amazing toppings for pancakes and ice cream!
Sustainable and eco-friendly tips
If you’re foraging your own elderberries, remember:
- Leave some berries for wildlife. Birds rely on elderberries in late summer and fall.
- Use reusable canning jars and lids. They’re better for the planet and your wallet.
- Compost leftover pulp. It adds nutrients to your garden soil.
For more sustainable foraging practices, check out The Forager’s Harvest, it’s a great resource for beginners.
Elderberry jelly recipe (quick recap)
Prep time: 30 minutes
Cook time: 30 minutes
Total time: 1 hour
Yield: About 4–5 half-pint jars
Ingredients
- 3 lbs elderberries
- 4 cups sugar
- 1 package powdered pectin
- 1/4 cup lemon juice
- 1 cup water
Instructions
- Destem and rinse the berries.
- Simmer with water for 15 minutes.
- Strain juice and measure 3–4 cups.
- Add lemon juice and pectin, bring to a boil.
- Add sugar, boil for 1 minute.
- Pour into jars and process for 10 minutes.
FAQs
Yes, you can! Use half the amount of dried berries and soak them in hot water for an hour before cooking.
You can, but it might take longer to set. Boil it longer to reduce naturally, or add a bit of apple juice for natural pectin.
Yes, once cooked and strained properly, elderberries are safe. Just keep portions moderate due to the sugar content.
Canned jelly lasts about 12 months, while refrigerated versions stay good for 3–4 weeks.
Final thoughts
Making your own elderberry jelly is one of those rewarding kitchen projects that combines health, flavor, and creativity. You get a beautiful, naturally tinted jelly that’s as good for your immune system as it is on a warm slice of bread.
If you’ve never tried making jelly before, this is the perfect beginner recipe to start with. Once you’ve mastered it, you’ll never go back to store-bought again.
So go ahead, grab those elderberries, roll up your sleeves, and create something sweetly empowering!

4
servings30
minutes30
minutes45 per tablespoon
kcalA beautifully rich and glossy homemade elderberry jelly that’s both delicious and naturally packed with antioxidants. Perfect on toast, pancakes, or even as a glaze for roasted meats.
Ingredients
3 pounds fresh or frozen elderberries (around 8–10 cups)
4 cups granulated sugar
1 package (1.75 oz) powdered pectin
1/4 cup lemon juice (freshly squeezed, if possible)
1 cup water
Directions
- Remove the elderberries from their stems, rinse well, and discard any green or unripe berries.
- Place the berries and water in a large pot. Simmer over medium heat for 10–15 minutes, stirring occasionally, until the berries are soft and release their juice.
- Pour the mixture through a jelly bag or cheesecloth-lined strainer and let it drip for a few hours or overnight. Do not press the pulp.
- Measure 3–4 cups of juice and pour it back into the cleaned pot. Add lemon juice and powdered pectin, stirring to dissolve.
- Bring the mixture to a rolling boil over high heat. Add all the sugar at once, stirring constantly.
- Return to a full boil and cook for 1 minute, stirring continuously.
- Remove from heat and skim off any foam.
- Pour the hot jelly into sterilized jars, leaving 1/4 inch of headspace.
- Wipe the rims, place lids on top, and process in a boiling water bath for 10 minutes.
- Let cool completely. Check seals before storing in a cool, dark place for up to 12 months.