If you’ve ever wanted to bake something light, airy, and heavenly (literally), this angel cake recipe is the one. This classic dessert looks like it took hours to make, but it’s surprisingly simple once you know a few tricks. Whether it’s for a birthday, afternoon tea, or just a sweet craving, this cake delivers that nostalgic bakery flavor with a cloud-like texture that melts in your mouth.
In this post, we’ll cover everything from ingredients and baking tips to serving ideas and FAQs. So grab your whisk, preheat your oven, and let’s get baking!
What is an angel cake?
Angel cake (also known as angel food cake) is a type of sponge cake made primarily with egg whites, sugar, and flour, no butter, no oil, and no egg yolks. The result? A fluffy, low-fat cake with a texture so light it feels like biting into a cloud.
Fun fact: Angel cake got its name in the late 19th century because of its ethereal, white-as-angel look and delicate taste. It quickly became an American favorite and for good reason!
Nutritional bonus: A slice of angel cake contains around 140 calories, with virtually zero fat, making it one of the most guilt-free desserts you can enjoy.
Why you’ll love this angel cake recipe
- Feather-light texture: The secret lies in perfectly whipped egg whites.
- Simple ingredients: You probably already have everything in your pantry.
- Naturally low in fat: No butter or oil required.
- Perfect for decorating: Top it with berries, whipped cream, or a dusting of powdered sugar.
- Crowd favorite: It’s elegant enough for dinner parties and comforting enough for lazy weekends.
Pro Tip: Angel cake tastes best the next day once it has had time to rest. The flavors settle beautifully!
Ingredients you’ll need
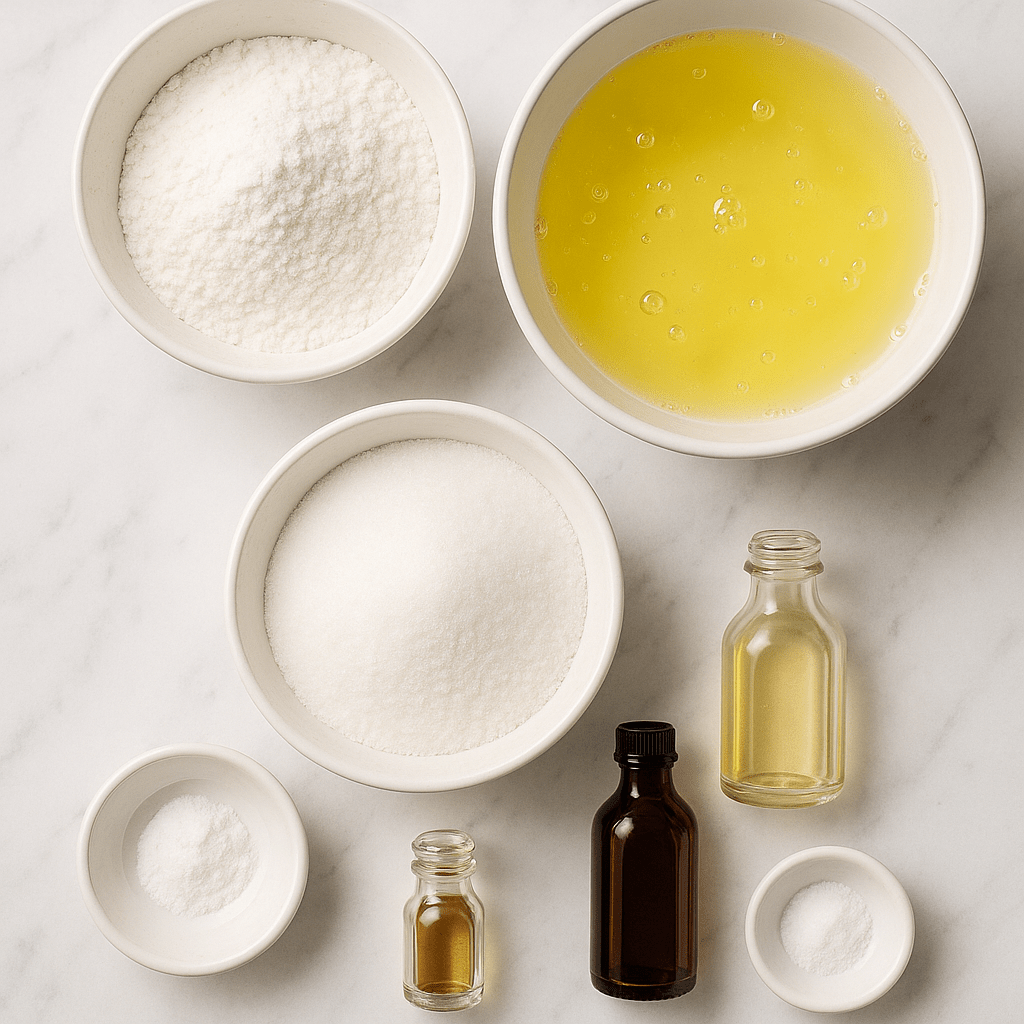
For this recipe, you’ll need:
- 1 cup (125g) cake flour (or plain flour sifted 3 times)
- 1 ½ cups (300g) granulated sugar
- 12 large egg whites (room temperature)
- 1 ½ teaspoons cream of tartar
- 1 teaspoon vanilla extract
- ¼ teaspoon almond extract (optional but heavenly)
- ¼ teaspoon salt
That’s it! No butter, no baking powder, no fuss.
Pro Tip: Use room-temperature egg whites for maximum volume. Cold eggs just don’t whip up the same way.
Equipment you’ll need
You don’t need fancy equipment, but a few essentials make all the difference:
- A stand mixer or hand mixer
- A tube pan (angel food cake pan) ungreased!
- A fine-mesh sieve for flour
- A rubber spatula for gentle folding
- A cooling rack
If you don’t have a tube pan, you can use a round pan, but make sure to invert it over a bottle after baking so the cake doesn’t collapse.
Step-by-step angel cake recipe
1. Preheat and prep
Set your oven to 170°C (340°F) and make sure your tube pan is completely clean and ungreased. This step might sound simple, but it’s one of the most crucial parts of baking an angel cake. Any trace of grease, butter, or even egg yolk residue can stop the egg whites from expanding properly, leaving you with a flat or dense cake instead of a fluffy one.
If your pan has been used for other cakes, wash it thoroughly with hot water and a bit of vinegar to remove any leftover oil. Dry it completely with a lint-free cloth. While your oven heats, carefully separate your eggs, make sure not a single drop of yolk gets into the whites. Even the smallest bit of fat will ruin your meringue’s volume. Crack each egg over a small bowl first, then transfer the white into your main mixing bowl once you’re certain it’s yolk-free. Doing them one at a time prevents disaster.
Pro Tip: Let your egg whites sit at room temperature for about 30 minutes before whipping. Room-temperature egg whites expand faster and create a stronger foam than cold ones.
2. Sift your dry ingredients
In a large bowl, sift together the flour, half the sugar, and the salt. Sifting isn’t just about combining ingredients, it’s the secret to achieving that cloud-like texture. It helps aerate the flour, break up lumps, and evenly distribute the sugar, which adds stability to your meringue later.
For best results, sift the mixture three times. Each sift makes your flour finer and lighter, which means your final cake will have a tender, delicate crumb instead of a dense bite. If you’re using plain flour instead of cake flour, triple-sifting is even more important, as it reduces gluten development and keeps your cake soft.
Pro Tip: Measure your flour after sifting to avoid adding too much. Too much flour is one of the most common reasons angel cake turns heavy instead of airy.
3. Beat the egg whites
This is where your cake begins to take shape and it’s also the most satisfying part. Start by adding your egg whites to a large, clean mixing bowl (metal or glass is best; avoid plastic as it can hold traces of grease). Begin beating on low speed until they become foamy and bubbly. This first stage helps build a strong protein network that will trap air later.
Add the cream of tartar to stabilize the whites and continue beating. Once the mixture looks frothy, increase your mixer to medium-high speed and continue whipping until soft peaks form. When you lift the beaters, the tips should curl slightly.
Now slowly sprinkle in the remaining half of the sugar, one tablespoon at a time. This gradual addition strengthens the meringue and keeps it glossy. Continue beating until you reach stiff peaks, the whites should hold their shape firmly and look shiny, not grainy.
Pro Tip: Don’t overbeat. Overwhipped egg whites lose elasticity and can collapse while baking. Stop as soon as the peaks stand tall and the mixture looks silky and smooth.
4. Fold gently
Now it’s time to combine your dry and wet ingredients and this is where patience pays off. Sprinkle about a quarter of your sifted flour mixture over the whipped egg whites. Using a rubber spatula, fold it in very gently. Use a slow figure-eight motion: cut down through the center, sweep along the bottom of the bowl, and lift the batter up and over. Turn the bowl slightly with each fold to mix evenly.
Add the remaining flour mixture in small batches, folding delicately each time. Avoid stirring or pressing down on the batter, as this will deflate the air you’ve built up. The final texture should be light, fluffy, and airy, not runny or heavy.
Pro Tip: If you notice small streaks of flour left at the end, don’t overmix to remove them, they’ll disappear during baking. Keeping the air inside is far more important.
5. Bake to perfection
Gently pour the batter into your ungreased tube pan. Do not tap or bang the pan on the counter, it might deflate your batter. You can run a knife gently through the mixture once to release large air pockets, but avoid overmixing. Smooth the top lightly with your spatula.
Place the pan on the lower-middle rack of your oven and bake for 35 to 40 minutes, or until the top turns golden brown and springs back when lightly touched. Avoid opening the oven door too early, as a sudden temperature change can cause the cake to collapse.
If you’re unsure whether it’s done, insert a wooden skewer or thin knife into the center. It should come out dry or with only a few moist crumbs, never wet batter.
Pro Tip: If your oven tends to brown things unevenly, rotate the pan halfway through baking, but only once the cake has already started to set around the 25-minute mark.
6. Cool upside down
When the cake comes out of the oven, it will still be fragile and soft inside, so it needs to cool in a way that keeps its structure. Immediately invert the pan upside down to cool. This prevents the cake from collapsing as gravity pulls on the still-warm sponge.
If your tube pan has metal feet, rest it on those. Otherwise, place it over the neck of a wine bottle or heatproof bottle so that air can circulate freely underneath. Leave it for at least one to one and a half hours, until completely cool.
Resist the urge to touch or release it early. Angel cake is delicate while warm, and even a small movement can cause it to shrink or deflate.
Pro Tip: Cooling upside down isn’t optional, it’s what gives angel cake its signature lightness and height.
7. Release and serve
Once fully cool, it’s time for the reveal. Run a thin knife or offset spatula around the outer edge of the pan and the center tube to loosen the cake. Gently lift out the inner section, then run your knife again along the bottom to free the base. Turn it upside down onto a serving plate and carefully lift off the pan.
To cut the cake without squashing the delicate crumb, use a serrated knife with a gentle sawing motion. Alternatively, you can use unflavored dental floss for perfectly smooth slices.
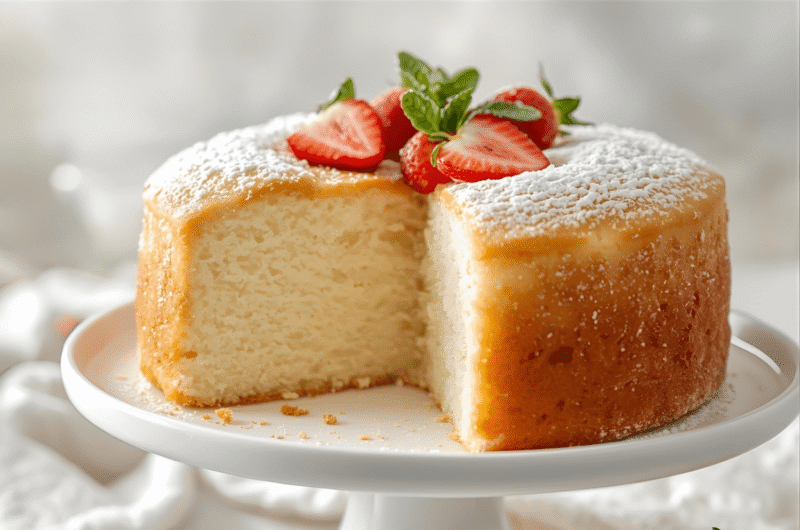
Serve plain, or top with whipped cream and fresh berries for a classic touch. You can also drizzle it with a lemon glaze, add toasted coconut flakes, or even layer it with fruit and yogurt for a lighter dessert option.
Pro Tip: Always make sure the cake is completely cool before decorating or frosting it. Warm cake will make glazes run and creams melt.
Decorating ideas for your angel cake
One of the best things about angel cake is how versatile it is. You can keep it classic or go full showstopper mode.
Simple ideas
- Dust with powdered sugar
- Serve with fresh berries and a dollop of whipped cream
- Drizzle with lemon glaze
Party-ready versions
- Add a strawberry coulis and top with mint leaves
- Layer with whipped cream and fruit for a trifle-style dessert
- Frost with light cream cheese frosting for extra decadence
Pro Tip: If you’re serving it the next day, wrap it tightly in cling film once cooled to keep it soft and moist.
Common mistakes (and how to avoid them)
Even though it’s simple, angel cake can be tricky if you miss a few details. Here are the top slip-ups bakers make:
- Overbeating egg whites – this causes dryness. Stop at stiff peaks.
- Greasing the pan – never grease it; the batter needs to cling to rise.
- Under-sifting flour – leads to dense cake. Sift at least 3 times.
- Deflating during folding – use gentle movements, don’t stir.
- Opening the oven early – this can cause the cake to collapse.
Pro Tip: If your cake shrinks too much, it’s probably underbaked. Add 3–5 more minutes next time and test with a toothpick.
How to store your angel cake
Angel cake keeps beautifully if stored right.
- Room temperature: 2–3 days in an airtight container.
- Fridge: Up to 5 days (wrap tightly to prevent drying).
- Freezer: Up to 2 months. Slice it first, then wrap each piece individually.
When ready to serve, let frozen slices thaw at room temperature for about 30 minutes.
Healthier twists and flavor variations
Angel cake is already one of the lightest cakes you can bake, but here are a few fun variations:
- Coconut angel cake: Add 1 tsp coconut extract and sprinkle shredded coconut on top.
- Chocolate swirl: Gently fold in 2 tbsp of cocoa powder to half the batter for a marbled effect.
- Citrus twist: Add lemon or orange zest for a refreshing flavor.
- Gluten-free version: Substitute cake flour with gluten-free flour blend, just make sure it’s finely milled.
Pro Tip: If you’re counting calories, skip the frosting and serve with fresh fruit or sugar-free whipped cream.
Serving suggestions
This cake pairs perfectly with:
- Afternoon tea or coffee
- Fruit salads in the summer
- Vanilla ice cream for a warm-cold combo
- Sparkling rosé or champagne for special occasions
It’s the kind of dessert that fits any mood, elegant, light, and always crowd-pleasing.
Fun fact: Why is angel cake white?
Angel cake’s signature white color comes from using only egg whites, while the golden crust forms naturally from sugar caramelization during baking. Interestingly, the cake’s airy structure was perfected thanks to 19th-century American bakers who used copper bowls to stabilize the egg whites, a technique still praised today by pastry chefs.
FAQs
Yes, but it won’t rise as evenly. If using a round pan, invert it on a bottle after baking to prevent collapsing.
Usually from underbaking or overfolding. Make sure stiff peaks form, and cool it upside down.
Fresh egg whites give the best structure. Carton ones can work but might not whip up as firm.
Don’t overbake, and store it wrapped tightly once cooled. You can also brush a simple syrup on top before serving.
Traditionally no, but you can easily make it so by using gluten-free flour.
Final thoughts
This angel cake recipe is the perfect blend of simplicity and elegance. It’s light, sweet, and endlessly versatile, a true classic that never goes out of style. Once you make it, you’ll understand why it’s called angel cake, it really does taste like heaven.
Now go whip those egg whites and make something beautiful!
12
servings30
minutes40
minutes150
kcalA light, airy, and delicately sweet angel cake made with whipped egg whites and no butter or oil. This classic dessert has a fluffy, cloud-like texture that melts in your mouth and pairs beautifully with fresh fruit or whipped cream.
Ingredients
1 cup (125g) cake flour (or plain flour sifted 3 times)
1 ½ cups (300g) granulated sugar
12 large egg whites (room temperature)
1 ½ teaspoons cream of tartar
1 teaspoon vanilla extract
¼ teaspoon almond extract (optional)
¼ teaspoon salt
Directions
- Preheat and prep
Preheat your oven to 170°C (340°F). Make sure your tube pan is clean and ungreased, as any grease will prevent the egg whites from rising properly. Separate the eggs carefully to ensure no yolk gets into the whites. - Sift your dry ingredients
In a large bowl, sift together the flour, half of the sugar, and the salt. Sift the mixture three times to aerate it well for that light and fluffy crumb. - Beat the egg whites
In a large mixing bowl, beat the egg whites on low speed until foamy. Add the cream of tartar and continue beating until soft peaks form. Gradually add the remaining sugar while beating until stiff, glossy peaks appear. - Fold gently
Sprinkle a portion of the sifted flour mixture over the beaten egg whites and gently fold using a rubber spatula. Repeat until all the flour is incorporated, being careful not to deflate the mixture. - Bake to perfection
Pour the batter into the tube pan and smooth the top. Bake for 35–40 minutes, or until the top is golden and springs back when lightly touched. - Cool upside down
Invert the pan immediately after removing it from the oven and let the cake cool completely upside down. This prevents it from collapsing. - Release and serve
Once cooled, run a knife around the edges to release the cake. Slice with a serrated knife and serve with whipped cream, berries, or a light dusting of powdered sugar.