Burnt pots happen to everyone. Whether you got distracted scrolling on your phone or the heat was a little too high, a burnt pot is one of those kitchen moments that instantly makes you think you’ve ruined your cookware.
Around 72 percent of home cooks admit to burning a pot at least once a month according to a small kitchen habits survey, so you’re very much not alone.
A pot usually burns because of:
- High heat with low moisture
- Sugar based sauces sticking to the bottom
- Oil reaching its smoke point
- Leaving food unattended for too long
Understanding the cause matters because it helps you pick the right cleaning method. Some burns are mostly carbon buildup. Others are sugar caramelizing into a sticky glue. And some are pure scorch marks that need abrasion.
Quick checklist before you start
Before diving into any method, do a little prep. It makes the entire cleaning process faster and prevents accidental damage.
- Remove any loose burnt flakes using a spatula
- Rinse the pot with warm water
- Avoid scrubbing aggressively before soaking
- Identify the pot type: stainless steel, nonstick, ceramic, enamel, aluminum
This is important: not every pot can handle the same treatment. Stainless steel is tough and can handle abrasion. Nonstick? Not so much.
Pro Tip: If you’re unsure about your pot material, search your model on the manufacturer’s website. Many brands list safe cleaning methods online.
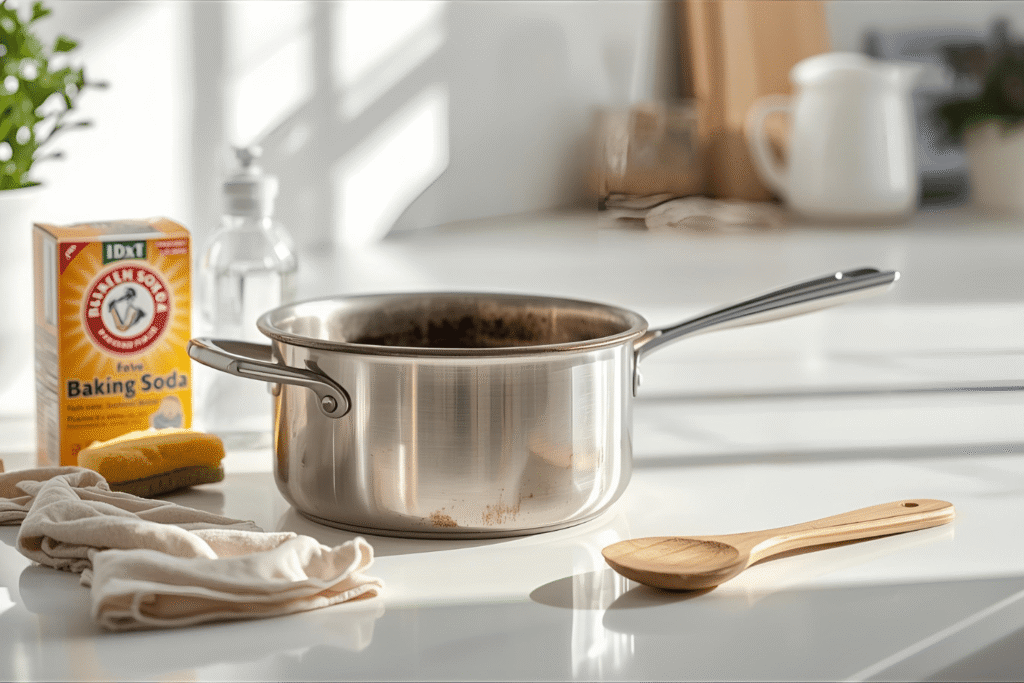
Method 1: Baking soda and vinegar
This is the iconic cleaning method everyone swears by, and for good reason. It’s effective, cheap, and safe for most cookware.
Why this method works
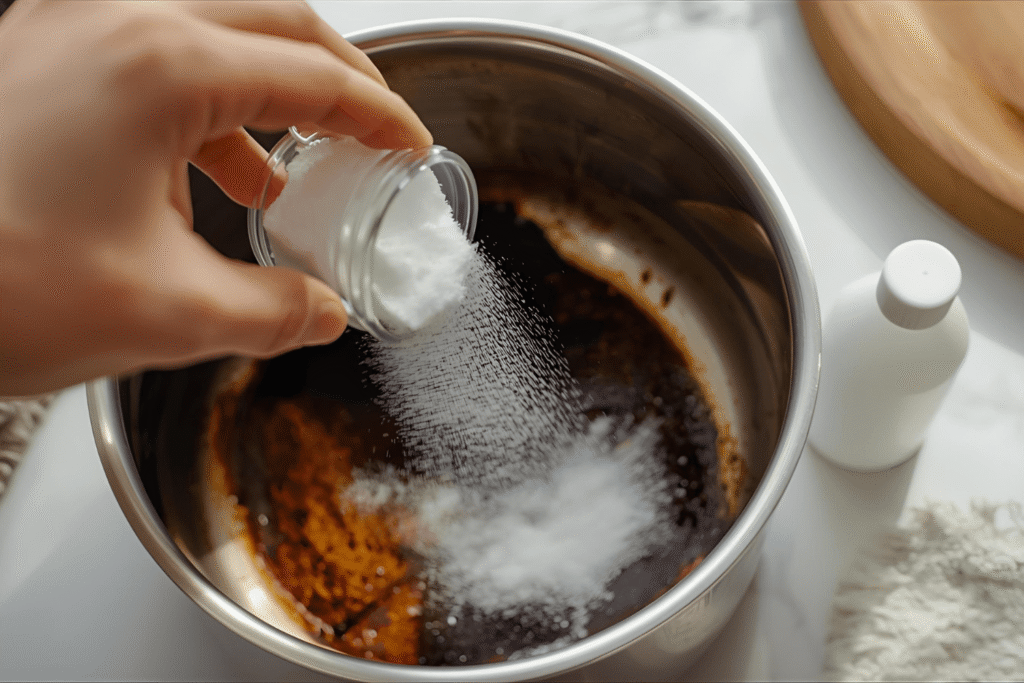
Baking soda is a mild abrasive, and vinegar is acidic. When they react, the bubbling helps lift stuck on carbon without you needing to scrub aggressively. This combo is especially great for burnt layers caused by starchy or sugary foods.
Step by step
- Sprinkle 2 to 3 tablespoons of baking soda over the burnt area
- Add just enough white vinegar to cover the bottom
- Let it fizz for 30 seconds
- Add 1 cup of hot water
- Simmer on low heat for 5 to 10 minutes
- Turn off the heat and let the pot cool
- Scrub gently with a sponge
- Rinse and repeat if needed
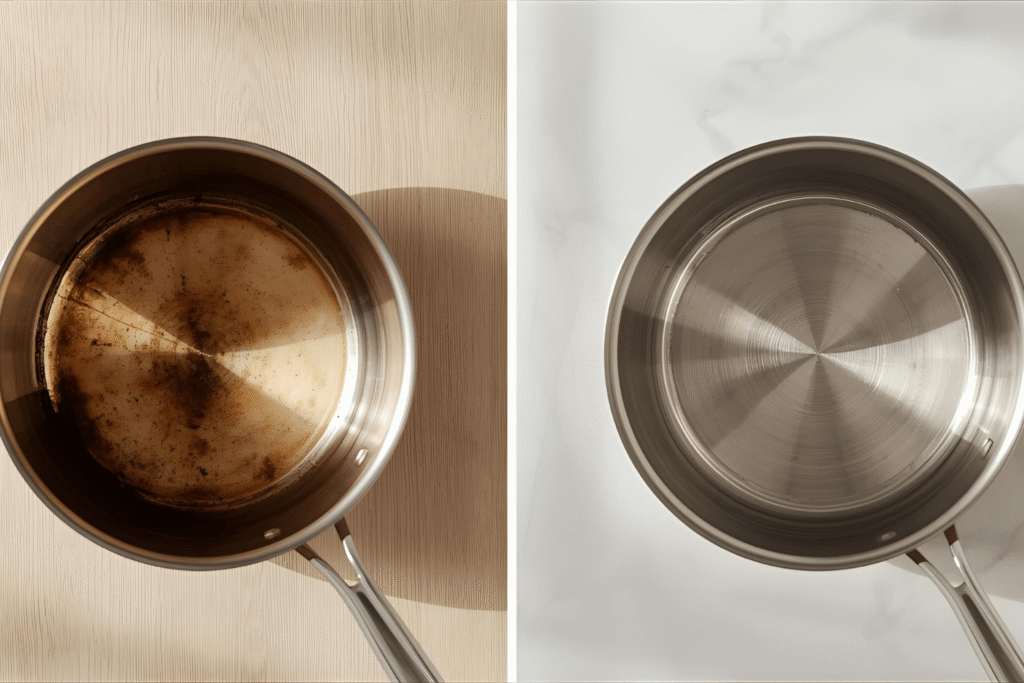
Most people see visible improvement after just one round. If your burn is deep, try soaking overnight.
When to use this method
Use this method when:
- The pot is stainless steel or enamel
- The burnt layer looks brown or black but not super thick
- You want minimal scrubbing
Avoid using this on aluminum pots because vinegar can discolor them.
Method 2: Boiling water and dish soap
This is one of the easiest and most beginner friendly methods for cleaning a burnt pot. If you don’t want to deal with vinegar smells or fizzing reactions, start here.
Step by step
- Fill the pot with water until it covers the burnt area
- Add 1 tablespoon of dish soap
- Bring to a boil
- Let it boil for 5 minutes
- Turn off the heat and let it cool
- Use a wooden spoon to scrape off softened burnt bits
- Wash normally with a sponge
This method often removes 60 to 80 percent of burnt residue on the first try.
Why this method is great for most households
Dish soap is designed to break down grease and food particles, so when combined with heat, it becomes even more powerful.
It’s ideal for:
- Nonstick pots
- Ceramic pots
- Any pot with oily or greasy burnt layers
Pro Tip: Add a teaspoon of baking soda to the soapy water if you want more cleaning power without making the mixture too abrasive.
Method 3: The salt and scrub technique
Salt works surprisingly well as a natural abrasive. Unlike harsh chemicals, salt crystals break down quickly, preventing scratches on most pots.
Step by step
- Sprinkle a generous layer of coarse salt over the burnt area
- Add a splash of warm water to form a paste
- Use a sponge or dish cloth to scrub in circles
- Rinse and repeat if needed
- Follow up with normal washing
This method is shockingly effective for lightly burnt bottoms.
Best for stainless steel
Stainless steel responds incredibly well to salt scrubbing. In fact, many chefs recommend it as part of regular cookware maintenance.
Use this when:
- The burn is thin
- There is mild discoloration
- You want an eco friendly option
Avoid using this on nonstick surfaces, because even a mild abrasive can wear down the coating.
Method 4: Dryer sheet hack
This trick exploded on TikTok, and while it looks strange, many people swear it works wonders for softening burnt food.
Step by step
- Place a dryer sheet inside the pot
- Fill with warm water
- Add one drop of dish soap
- Let it sit for 1 to 2 hours
- Remove the sheet
- Wipe the bottom with a sponge
The surfactants in dryer sheets help loosen food particles. It’s surprisingly gentle.
When this method is worth trying
Try this when:
- You have a ceramic or nonstick pot
- The burn is mostly food residue, not carbon
- You want a no scrub method
Pro Tip: Use unscented dryer sheets to avoid transferring strong fragrance to your cookware.
Method 5: Commercial cleaners
Sometimes a burnt pot is beyond home remedies. If you’ve tried multiple methods and the bottom still looks like a crime scene, commercial cleaners can help.
Recommended types:
- Bar Keepers Friend
- Weiman Cookware Cleaner
- Stainless steel polish
Pros and cons
Pros:
- Very effective on deep discoloration
- Saves time
- Works on long term burnt buildup
Cons:
- Can be too harsh for nonstick pots
- Requires gloves and ventilation
- Not the cheapest option
Safety notes
Always check the label for:
- Pot compatibility
- Ventilation requirements
- Instructions on rinsing thoroughly
Also, only use these cleaners occasionally. Overuse can wear down protective layers on stainless steel.
What not to do when cleaning a burnt pot
Some cleaning advice online sounds helpful but can actually damage your cookware. Here are things you should never do:
- Never use steel wool on nonstick cookware
- Never use bleach
- Do not scrape aggressively with metal utensils
- Avoid extremely cold water on a hot pot (it can warp the metal)
- Do not leave vinegar on aluminum for long periods
Pro Tip: If you’re cleaning an expensive pot, check the brand’s care guide before trying any viral method. Many cookware companies share cleaning advice directly on their websites.
How to prevent pots from burning in the future
Once you revive your pot, it’s time to avoid burning it again. Prevention saves time, energy, and frustration.
Here are simple habits that help:
- Use medium heat more often
- Stir sauces frequently
- Avoid walking away from boiling water or milk
- Use nonstick spray sparingly
- Soak pots immediately after cooking
- Preheat oils slowly instead of on high
A surprising stat: Over 50 percent of burnt pots happen during multitasking, not during complex cooking. Staying mindful while cooking is more effective than any cleaning hack.
Additional prevention tips
- Choose the right pot size for what you’re cooking
- Lower the heat slightly once liquids come to a boil
- Use timers, even for simple tasks
Little habits make a big difference.
FAQs
Start with boiling water and dish soap. Then try baking soda and vinegar. If both fail, use a commercial cleaner like Bar Keepers Friend. For extremely burnt carbon, you may need to repeat the process multiple times.
Baking soda is safe for most pots, including stainless steel, enamel, and ceramic. Avoid using it aggressively on nonstick surfaces.
Use warm water, dish soap, and gentle soaking methods. Avoid anything abrasive. The dryer sheet hack can work well for nonstick.
Some stainless steel discoloration is normal and doesn’t affect performance. You can polish it occasionally with a stainless steel cleaner.
This usually means your stove has uneven heat distribution. Try rotating the pot while cooking, or use a heat diffuser on gas stoves.
Final thoughts
Cleaning a burnt pot doesn’t have to feel overwhelming. With the right method, a little patience, and a few simple household ingredients, you can bring almost any pot back to life.
Try to match the cleaning technique to your pot type and the severity of the burn. And once your cookware is sparkling again, building a few small habits in the kitchen can help prevent the problem from coming back.
If you’re still unsure which method to try first, start simple. The baking soda and vinegar routine is a favorite for a reason, and it’s completely budget friendly. If that doesn’t work, move through the list until you find the one that fits your pot and the type of burn you’re dealing with.
Remember that every kitchen mishap is fixable. Burnt pots happen even to confident home cooks, and learning how to clean a burnt pot is just part of becoming more comfortable in the kitchen. With the right approach, your cookware will look fresh, shiny, and ready for your next recipe.