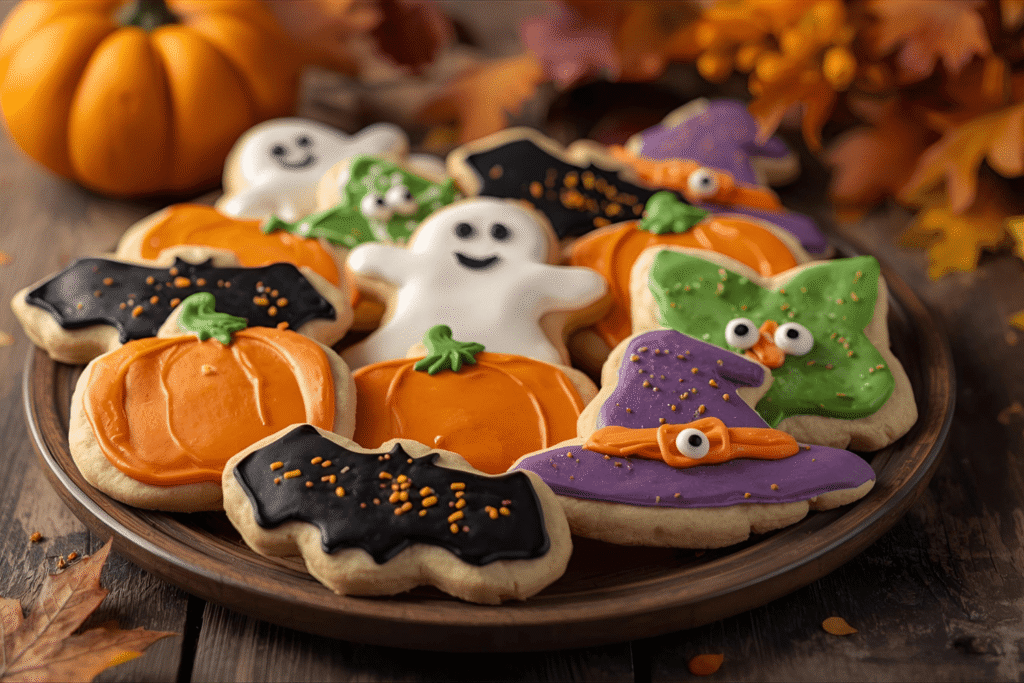
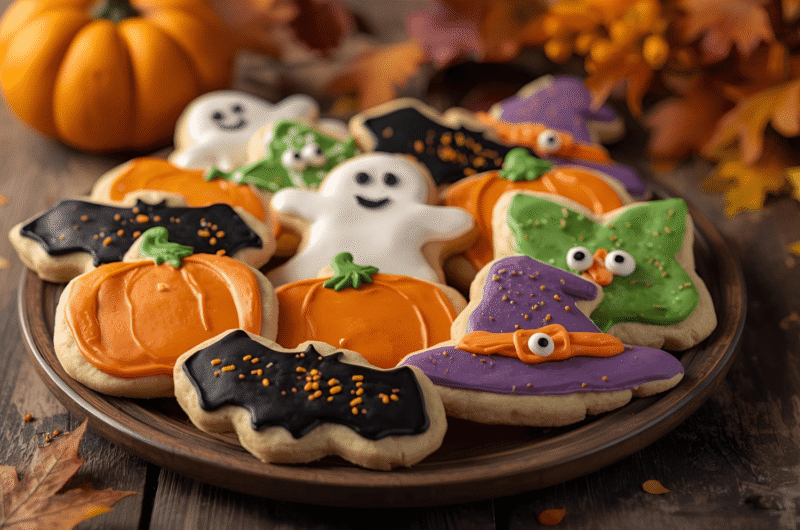
Halloween is the time of year when kitchens smell like butter, sugar, and just a hint of spooky magic. If you’ve ever wanted to make cookies that are as fun to decorate as they are to eat, this Halloween sugar cookies recipe is going to be your new favorite tradition.
Not only are these cookies buttery and soft on the inside with a crisp edge, but they also hold their shape perfectly for decorating. Think pumpkins, ghosts, bats, and even witch hats that come out of the oven ready for icing fun.
According to a recent survey, over 160 million Americans celebrate Halloween every year, and cookies remain one of the top homemade treats shared at parties and family gatherings. That’s a lot of sugar, sprinkles, and frosting!
So grab your rolling pin, round up the kids (or friends who never outgrew sprinkles), and let’s make something delicious and spooky.
Why you’ll love this Halloween sugar cookies recipe
- They keep their shape when baked, no spreading into unrecognizable blobs.
- The dough is easy to roll and cut, even for beginners.
- Perfect for parties, school treats, or just cozy nights with Netflix.
- Fun to decorate with icing, sprinkles, or edible glitter.
- You can make them ahead and freeze for later.
Pro Tip: These cookies double as both a baking project and a creative art session. Set out icing bags in different colors and let everyone “design” their own cookie creations.
Ingredients you’ll need
To make about 30 cookies (depending on cutter size), gather:
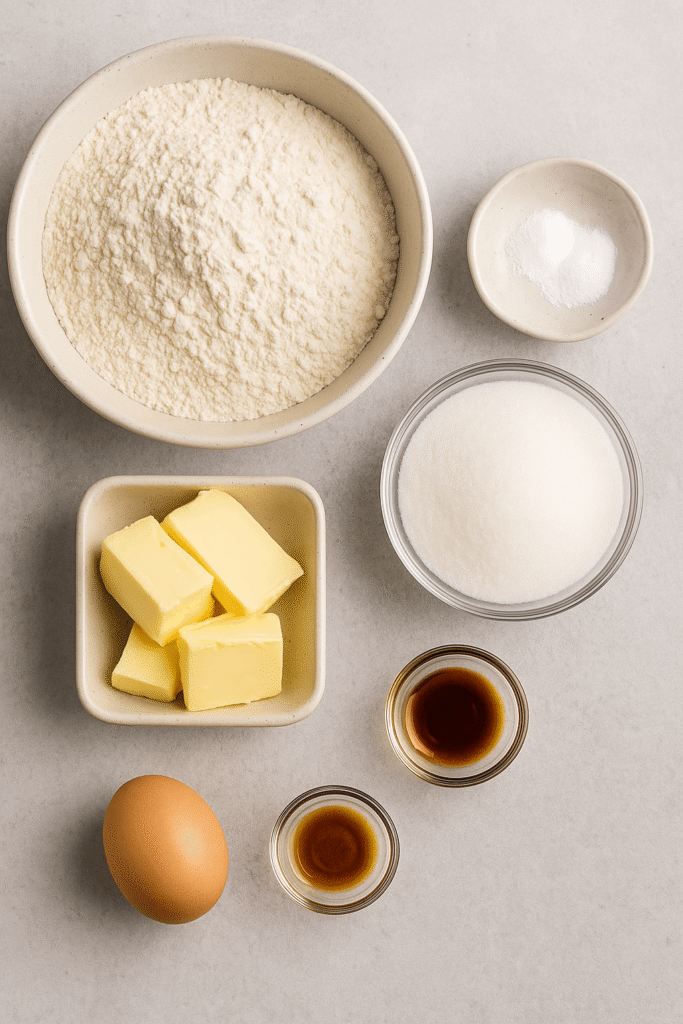
- 3 cups all-purpose flour
- 1 teaspoon baking powder
- ½ teaspoon salt
- 1 cup unsalted butter (softened)
- 1 cup granulated sugar
- 1 large egg
- 1 teaspoon vanilla extract
- ½ teaspoon almond extract (optional, but adds amazing flavor)
For the icing:
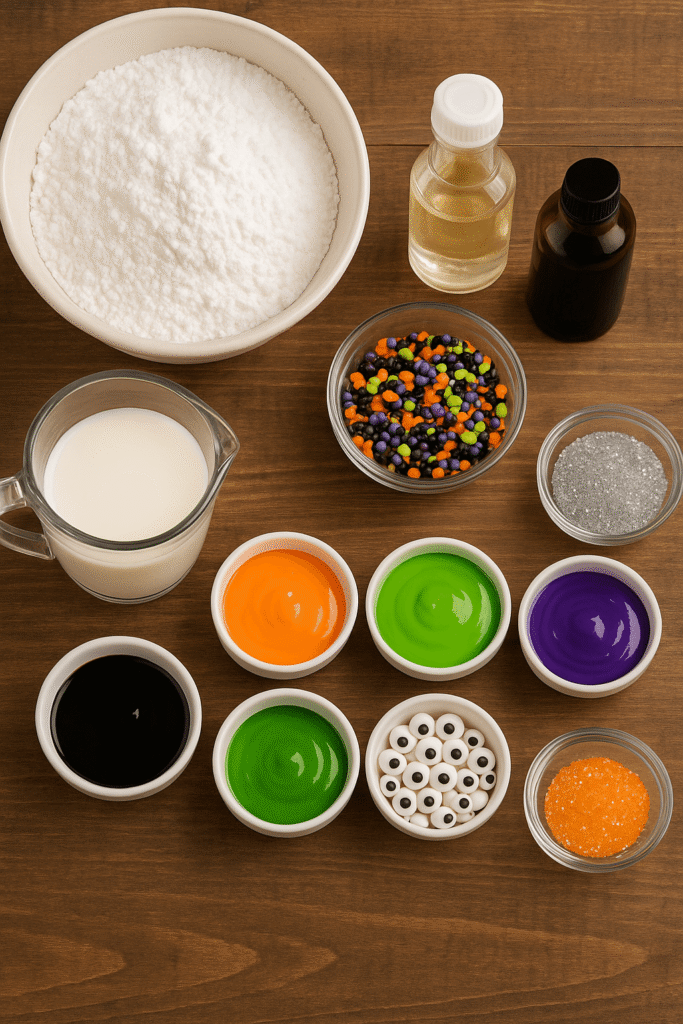
- 3 cups powdered sugar
- 2–3 tablespoons milk (adjust for consistency)
- 1 tablespoon light corn syrup
- ½ teaspoon vanilla extract
- Food coloring gels (orange, black, green, purple for Halloween vibes)
- Sprinkles, candy eyes, edible glitter
Step-by-step instructions
Step 1: Make the dough
Start by combining your dry ingredients. In a medium mixing bowl, whisk together the flour, baking powder, and salt. Whisking evenly distributes the baking powder and salt so that every cookie rises consistently and tastes balanced.
In a larger bowl, cream together the softened butter and sugar using either a stand mixer with a paddle attachment or a hand mixer. Beat on medium speed until the mixture is light, fluffy, and pale in color – this usually takes about 2–3 minutes. Creaming incorporates air into the butter, which gives the cookies their soft, tender texture.
Next, add in the egg, vanilla extract, and almond extract (if using). Beat until well combined. The almond extract adds a subtle nutty flavor that elevates the classic sugar cookie taste – but if you’re not a fan, you can simply skip it.
Gradually add the dry ingredients to the wet mixture, one cup at a time, mixing on low speed. Stop as soon as the dough comes together – overmixing can make the cookies tough. The dough should be soft but not sticky. If it’s sticking to your hands or the bowl, sprinkle in an extra tablespoon of flour at a time until it reaches the right consistency.
Pro Tip: To check if the dough is ready, press it gently with your finger. If it holds its shape without clinging too much, you’re good to go.
Step 2: Chill the dough
Once your dough is mixed, divide it into two equal portions. Shape each into a flat disc, then wrap tightly in plastic wrap. Place both discs in the refrigerator for at least 1 hour.
Why is chilling important? Chilling allows the butter to firm back up, which keeps the cookies from spreading into thin puddles while baking. It also gives the flour time to hydrate, making the dough easier to roll out and cut clean shapes.
If you’re short on time, you can pop the dough in the freezer for about 20 minutes, but overnight chilling will give you the best results.
Pro Tip: This recipe is perfect for prep-ahead baking. Make the dough the night before a Halloween party, chill overnight, and the next day you’ll be ready to cut, bake, and decorate without stress.
Step 3: Cut out shapes
Preheat your oven to 350°F (175°C) and line your baking sheets with parchment paper or silicone mats. Parchment helps prevent sticking and ensures even browning.
On a lightly floured surface, roll out one dough disc at a time to about ¼ inch thickness. Try to keep the thickness consistent across the dough – this way, all your cookies bake evenly.
Grab your Halloween-themed cookie cutters – pumpkins, ghosts, bats, cats, or witch hats – and press them firmly into the dough. Transfer the shapes to your prepared baking sheet, leaving about 1 inch of space between each cookie. Gather the dough scraps, re-roll them, and cut again until you’ve used it all.
Pro Tip: Dip your cookie cutters lightly in flour before pressing them into the dough. This keeps the dough from sticking and gives you clean edges.
Step 4: Bake
Place your baking sheets in the preheated oven and bake for 8–10 minutes. The exact time will depend on your oven and the size of your cookies. You’ll know they’re ready when the edges are set and just starting to turn golden – don’t overbake, or they’ll lose their soft, chewy texture.
Remove the cookies from the oven and let them cool on the baking sheet for 5 minutes before transferring them to a wire rack to cool completely. Cooling is essential – decorating warm cookies will cause the icing to melt and slide right off.
Pro Tip: If you’re baking multiple trays, rotate them halfway through to ensure even baking.
Step 5: Make the icing
While the cookies cool, prepare your icing. In a medium bowl, whisk together the powdered sugar, milk, corn syrup, and vanilla extract until smooth. The corn syrup is the secret to a glossy, shiny finish that looks bakery-worthy.
Divide the icing into smaller bowls, depending on how many colors you want. Use gel food coloring for the most vibrant hues – orange for pumpkins, black for bats and cats, green for witch hats, and purple for fun accents. Stir each bowl well until the colors are fully mixed.
Consistency matters: for outlining cookies, your icing should be thicker (think toothpaste). For flooding, where you fill in the outlined area, it should be thinner (more like honey). Adjust the texture by adding a few drops of milk if it’s too thick, or extra powdered sugar if it’s too thin.
Pro Tip: Keep a damp cloth over your icing bowls while you work. Royal icing tends to dry quickly, and this trick prevents a crust from forming on top.
Step 6: Decorate
Now comes the fun part – decorating! Fill piping bags (or ziplock bags with a corner snipped off) with your colored icing. Start by outlining each cookie shape with the thicker icing. This creates a border that helps contain the flood icing inside. Then, using a slightly thinned version of the same color, fill in the center of the cookie. Gently shake or tilt the cookie to spread the icing evenly.
While the icing is still wet, add sprinkles, edible glitter, or candy eyes for a playful Halloween touch. Let each cookie dry completely before stacking or storing. Depending on your icing thickness, drying may take anywhere from 4 to 12 hours.
Pro Tip: For a professional finish, use a toothpick to pop any air bubbles in the icing and smooth out small gaps. Want extra detail? Once the first icing layer has set, pipe contrasting lines or dots on top for depth and texture.
Creative decoration ideas
Halloween is all about creativity. Here are a few easy but impressive ideas:
- Pumpkins: Outline in orange, add ridges with a darker shade, and finish with a green stem.
- Ghosts: White flood icing with black eyes and mouth. Simple yet adorable.
- Witch hats: Black hat with a purple band and tiny yellow buckle.
- Spiders: Round cookie with black icing, candy eyes, and piped legs.
Decorating sugar cookies is also a fun kids’ activity during a Halloween party. You can set up a decorating station and let each guest take their creations home.
Tips for the best Halloween sugar cookies recipe
- Always chill your dough, this prevents spreading.
- Use gel food coloring instead of liquid to avoid thinning the icing.
- Store decorated cookies in a single layer until icing sets.
- Freeze undecorated cookies for up to 3 months.
- Roll dough evenly so all cookies bake at the same rate.
Pro Tip: If you’re short on time, skip the royal icing and just dip the cookies in melted white or dark chocolate. Add sprinkles before the chocolate hardens for a shortcut that still looks festive.
Make-ahead and storage
These cookies are incredibly forgiving when it comes to timing.
- Dough: Make ahead and refrigerate for up to 3 days or freeze for 2 months.
- Baked cookies: Store undecorated in an airtight container for 1 week, or freeze for up to 3 months.
- Decorated cookies: Best enjoyed within 3–4 days, as the icing may soften over time.
Pairing ideas
Want to make your Halloween table extra fun? Pair these cookies with:
- Pumpkin spice lattes for a cozy adult treat.
- Hot chocolate for kids (top with ghost-shaped marshmallows).
- Apple cider for a classic fall vibe.
Why homemade is better than store-bought
While store-bought cookies save time, homemade sugar cookies let you control quality, flavor, and creativity. You know exactly what’s going into them, and they’re free from preservatives.
Plus, baking together has proven emotional benefits. A 2020 study found that cooking as a family boosts happiness levels and reduces stress. And let’s be honest, there’s something magical about pulling warm cookies out of the oven and decorating them with people you love.
Nutritional breakdown
Each cookie (without icing) is approximately:
- Calories: 120
- Fat: 5g
- Carbohydrates: 17g
- Sugar: 8g
- Protein: 1g
Of course, icing adds extra sugar and calories, but hey, it’s Halloween, so it’s worth it.
FAQs
Yes, substitute a high-quality 1:1 gluten-free baking flour. The texture may be slightly more crumbly but still delicious.
You can, but butter gives the best flavor and structure. Margarine often makes cookies spread more.
No, but it adds depth to the flavor. If you don’t like almond, just use extra vanilla.
At least 1 hour, but overnight works best. Skipping this step risks cookies losing their shape.
Absolutely. These cookies taste amazing plain, or you can dust them with powdered sugar instead.
Final thoughts
This Halloween sugar cookies recipe is more than just a treat, it’s an activity, a party centerpiece, and a memory-maker. Whether you’re baking with kids, hosting friends, or simply treating yourself, these cookies deliver festive fun in every bite. So put on some spooky music, light a pumpkin-scented candle, and let the sugar, butter, and sprinkles bring your Halloween to life.
30
servings30
minutes40
minutes185 per cookie
kcalSoft, buttery sugar cookies that hold their shape perfectly and are decorated with spooky Halloween icing. Fun to bake, easy to decorate, and perfect for parties or festive treats.
Ingredients
- For the cookies:
3 cups all-purpose flour
1 teaspoon baking powder
½ teaspoon salt
1 cup unsalted butter (softened)
1 cup granulated sugar
1 large egg
1 teaspoon vanilla extract
½ teaspoon almond extract (optional)
- For the icing and decorations:
3 cups powdered sugar
2–3 tablespoons milk (adjust for consistency)
1 tablespoon light corn syrup
½ teaspoon vanilla extract
Gel food coloring (orange, black, green, purple)
Sprinkles, candy eyes, edible glitter
Directions
- In a medium bowl, whisk together flour, baking powder, and salt.
- In a larger bowl, cream butter and sugar until light and fluffy (2–3 minutes). Beat in the egg, vanilla, and almond extract.
- Gradually add dry ingredients to wet mixture until dough forms. If sticky, add flour 1 tablespoon at a time.
- Divide dough into 2 discs, wrap in plastic wrap, and chill for at least 1 hour (overnight is best).
- Preheat oven to 350°F (175°C). Roll dough to ¼ inch thickness on a floured surface. Cut into Halloween shapes with cookie cutters.
- Place cookies on parchment-lined baking sheets. Bake for 8–10 minutes until edges are just golden. Let cool completely on wire racks.
- To make icing, whisk together powdered sugar, milk, corn syrup, and vanilla until smooth. Divide into bowls and tint with food coloring.
- Outline cookies with thicker icing, then flood with thinner icing for a smooth finish. Add sprinkles, candy eyes, and glitter before icing sets.
- Allow decorated cookies to dry completely (4–12 hours depending on icing thickness) before stacking or storing.